
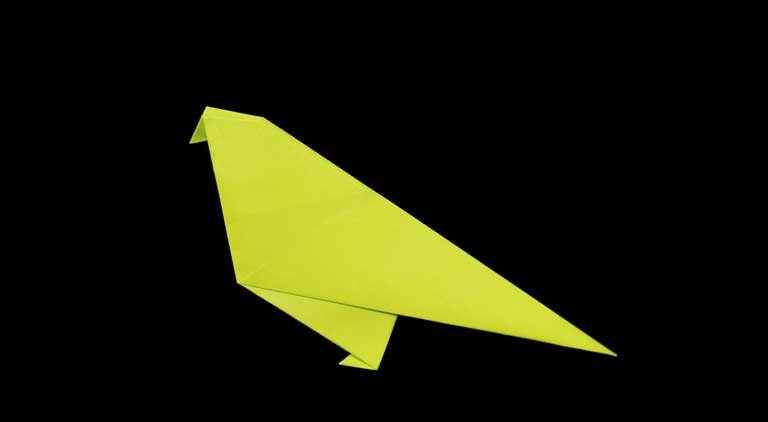
Discover how to fold an adorable origami sparrow with our easy, step-by-step guide. This fun project uses clear diagrams that make the process simple enough for children to follow along. Perfect for a creative craft session, this tutorial helps kids learn the basics of origami while creating a charming paper bird.
How to Make an ORIGAMI Bird (Sparrow)
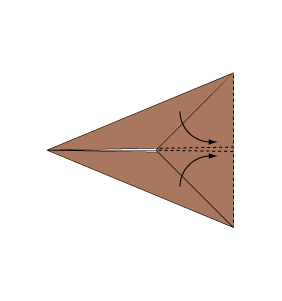
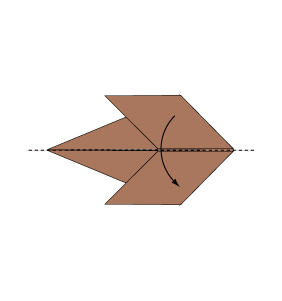
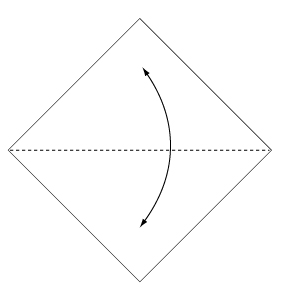 Step 1: Fold and crease in the direction of the arrow.
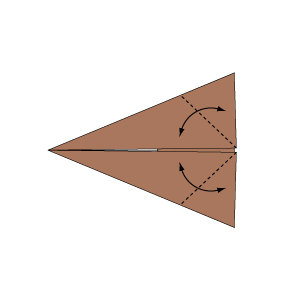
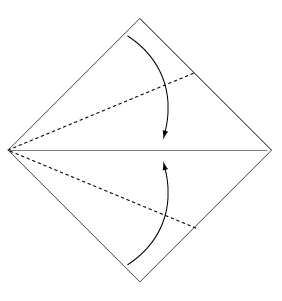 Step 2: Fold the paper along the dotted line in the direction of the arrow.
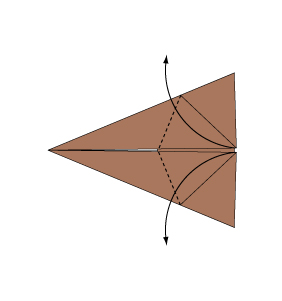
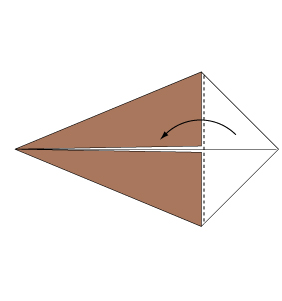 Step 3: Fold the paper along the dotted line in the direction of the arrow.
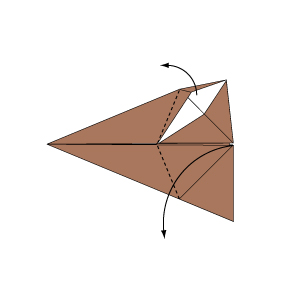
 Step 4: Bring the flaps of the triangle at the bottom to the top.
 Step 5: Fold and crease in the direction of the arrow.
 Step 6: Open the paper as shown to create a small pocket. Then flatten down the sides of the pocket.
 Step 7: Continue from Step 6.
 Step 8: Fold in half along the dotted line.
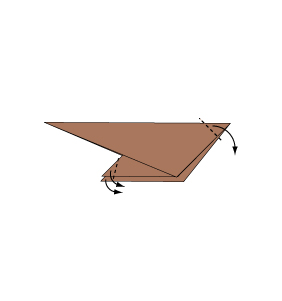 Step 9: Fold the paper along the dotted line in the direction of the arrow.
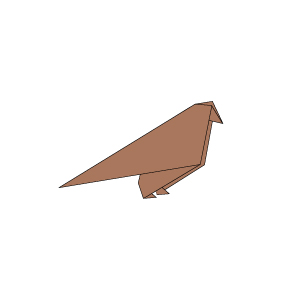 Step 10: Complete.
Congratulations on creating your origami sparrow! Enjoy displaying your new paper bird or use it as a delightful decoration. Whether you’re crafting with family or on your own, this project is a great way to spark creativity and develop fine motor skills.
Comments