
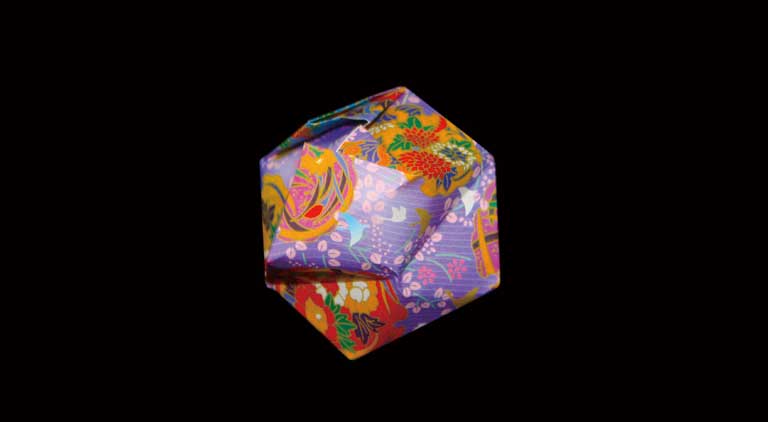
Unleash your creativity with our origami paper balloon tutorial! With just a square piece of paper and clear, easy-to-follow instructions, you can fold a three-dimensional balloon that you can inflate like a mini version of a party balloon. This project is ideal for creative minds and offers a unique twist on traditional origami.
How to Make an ORIGAMI Paper Balloon
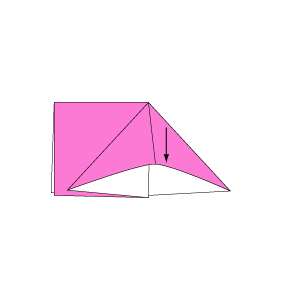
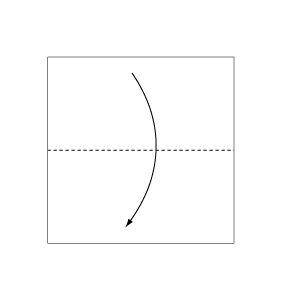 Step 1: Fold the paper along the dotted line in the direction of the arrow.
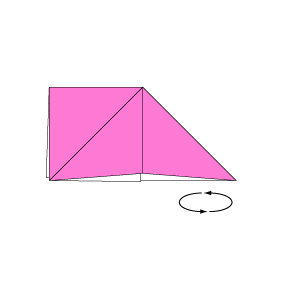
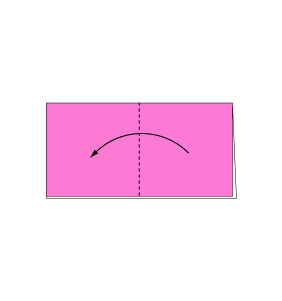 Step 2: Fold the paper along the dotted line in the direction of the arrow.
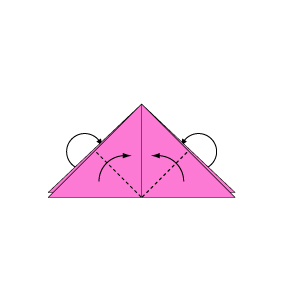
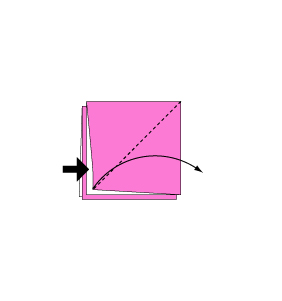 Step 3: Open the paper as shown to create a small pocket, then flatten down the sides of the pocket.
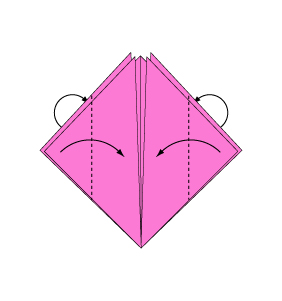
 Step 4: Continue from step 3.
 Step 5: Turn over the paper.
 Step 6: Open the paper as shown to create a small pocket, then flatten down the sides of the pocket.
 Step 7: Fold the paper along the dotted line in the direction of the arrow, then fold the reverse side in the same manner.
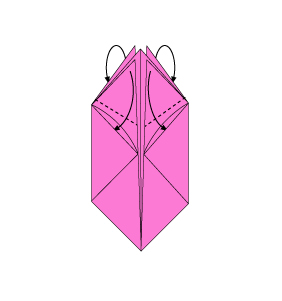
 Step 8: Fold the paper along the dotted line in the direction of the arrow, then fold the reverse side in the same manner.
 Step 9: Fold along the dotted line in the direction of the arrow and insert the edge into the pocket. Repeat for the reverse side.
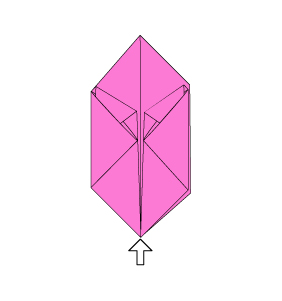 Step 10: Hold the sides and blow air into the small hole to inflate the paper balloon.
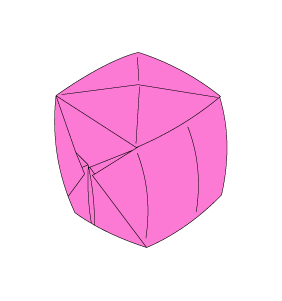 Step 11: Complete.
Well done on creating your origami paper balloon! This delightful 3D craft not only serves as a fun decorative piece but also highlights the endless possibilities of origami. Enjoy your new creation and let it inspire further artistic adventures.
Comments