
Transform a simple piece of paper into a versatile origami box with our step-by-step guide. This tutorial not only offers 18 unique box styles—from accessory containers to trash bins—but also provides an engaging activity for children to boost their learning skills and a fun brain exercise for seniors. Enjoy a creative project that fits any time and place!
How to make an origami box
A simple piece of paper that can be transformed into a handy origami box! This easy tutorial shows you 18 different kinds of super-convenient boxes—from a cute accessory container to a practical trash bin. Perfect for kids and adults alike, origami boxes are a popular activity in nurseries and kindergartens. Once learned, they can be folded anytime, anywhere!
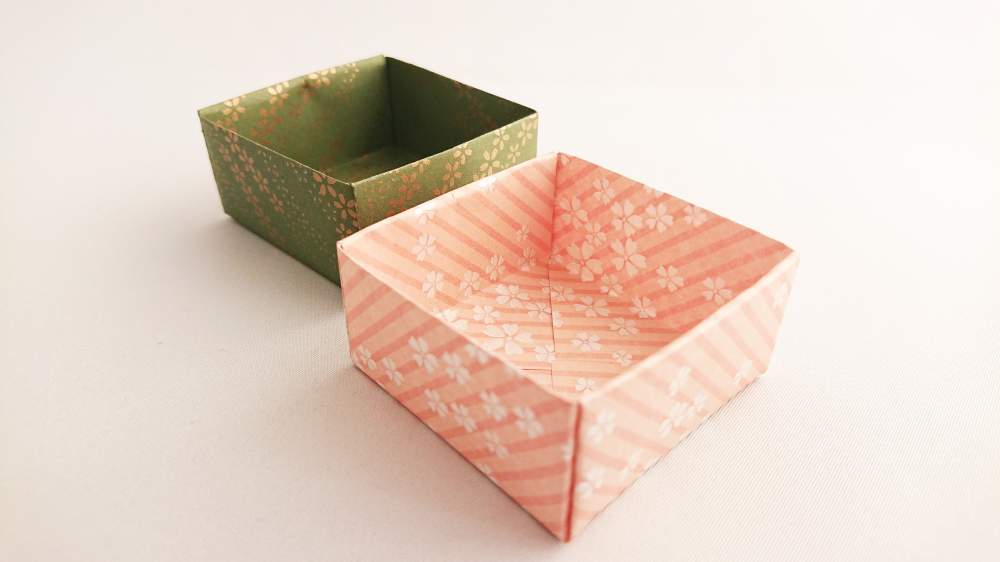
Step 1
 Fold and crease in the direction of the arrow.
Step 2
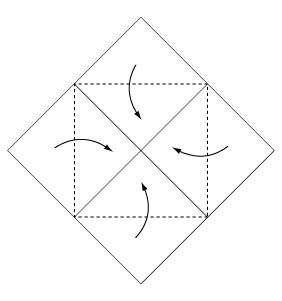 Fold the paper along the dotted line in the direction of the arrow.
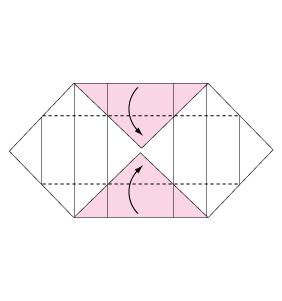
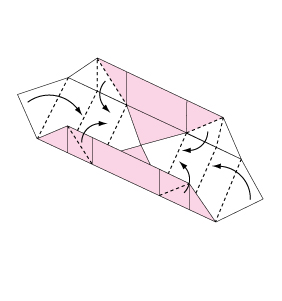
Step 3
 Fold and crease in the direction of the arrow.
Step 4
 Open the paper in the direction of the arrow.
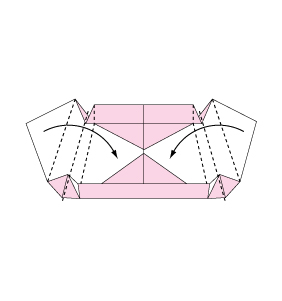
Step 5
 Fold the paper along the dotted line in the direction of the arrow.
Step 6
 Open the paper as shown to create a box.
Step 7
 Assemble along the dotted line.
Step 8
 Assemble along the dotted line.
Step 9
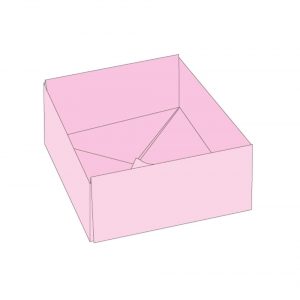 Complete.
Congratulations on completing your origami box! This creative project not only offers practical storage solutions but also serves as an excellent educational tool for children and a delightful brain exercise for seniors. Enjoy your new craft and keep exploring more origami designs!
Comments