

Discover the art of origami by making a graceful bird from one square of dual-colored paper. This project lets the contrasting hues shine as the bird’s wings flap elegantly. It’s a wonderful activity to foster creativity in children and to provide seniors with a fun and engaging cognitive exercise. Follow our step-by-step guide and let your art take flight.
How to make an ORIGAMI Bird
Origami paper always comes in the shape of a colorful square. If your paper has two different colored sides, you can create a bird with flapping wings that make the colors dance.
Step 1
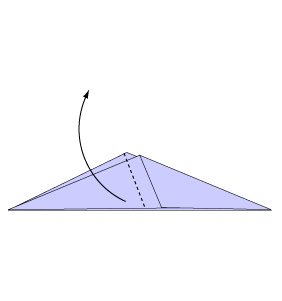
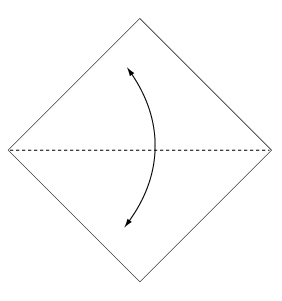 Fold and crease in the direction of the arrow.
Step 2
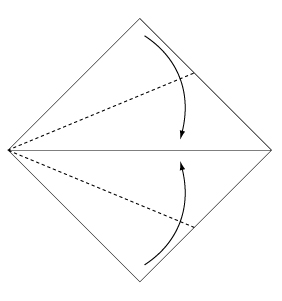 Fold the paper along the dotted line in the direction of the arrow.
Step 3
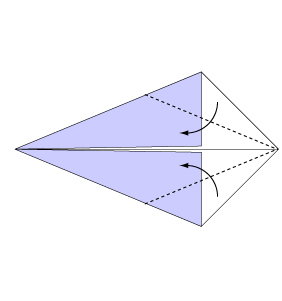 Fold the paper along the dotted line in the direction of the arrow.
Step 4
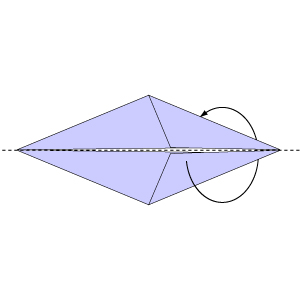 Fold backwards along the dotted line.
Step 5
 Fold the paper with the dotted line on the inside.
Step 6
 Rotate the paper 90 degrees to the left.
Step 7
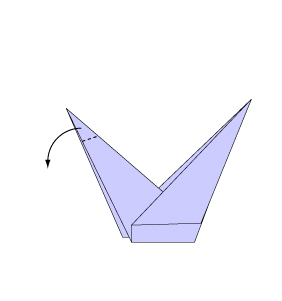 Fold the paper with the dotted line on the inside.
Step 8
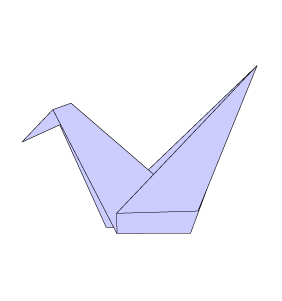 Complete.
Your origami bird is complete—a stunning display of color and creativity! This craft not only enhances artistic skills in kids but also offers seniors a delightful mental challenge. Enjoy your beautiful paper bird and use it as inspiration for your next origami adventure.
Comments