

Discover the fascinating world of origami with our comprehensive step-by-step guide to making an origami box with legs. In this tutorial, you’ll learn how to transform a simple A4 sheet into a stunning, functional box complete with legs. Whether you need a stylish pen holder, a practical storage solution, or an eye-catching decorative piece, this project offers endless possibilities. Follow our clear instructions and detailed diagrams, and unleash your creativity with this fun and engaging paper craft project!
How to make an origami box
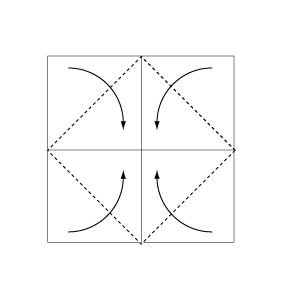
Step 1
Fold and crease in the direction of the arrow.

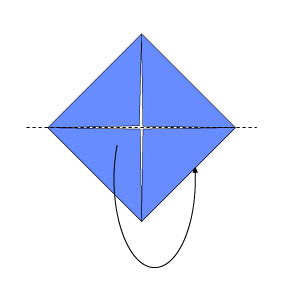
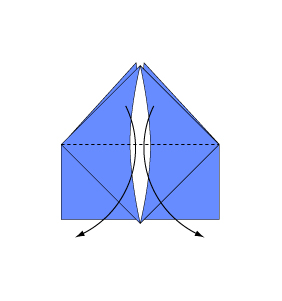
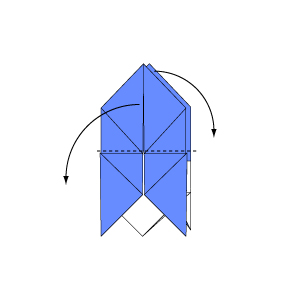
Step 2
Fold the paper along the dotted line in the direction of the arrow.
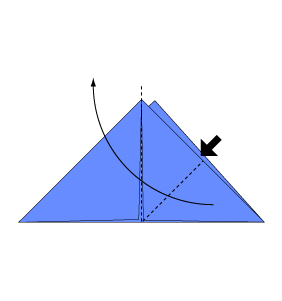
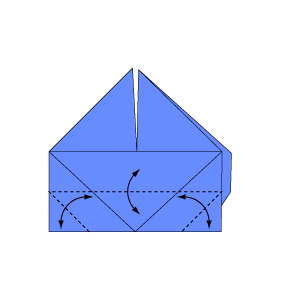
Step 3
Fold backwards along the dotted line.
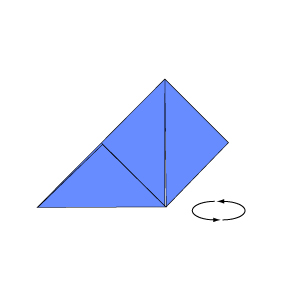
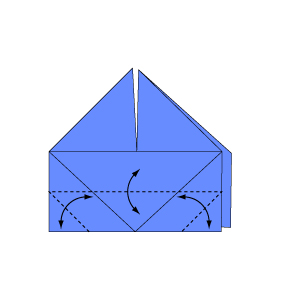
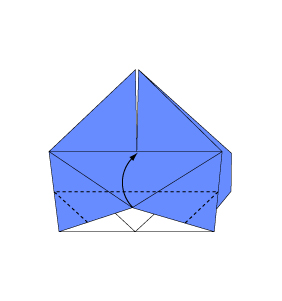
Step 4
Open the paper as shown to create a small pocket. Then flatten down the sides of the pocket.
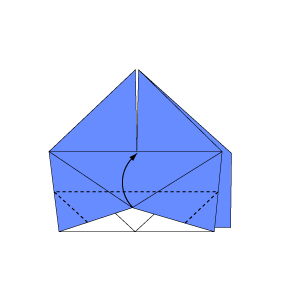
Step 5
Continue from Step 4.

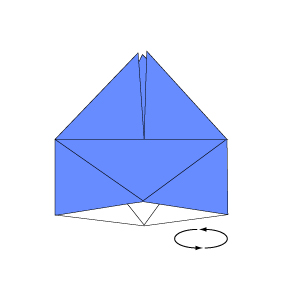
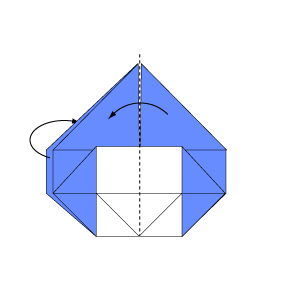
Step 6
Turn over the paper.
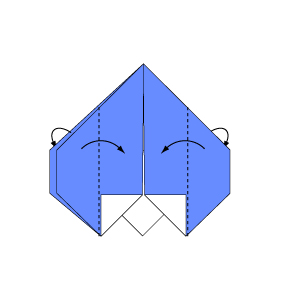
Step 7
Open the paper as shown to create a small pocket. Then flatten down the sides of the pocket.

Step 8
Open the paper as shown to create a small pocket. Then flatten down the sides of the pocket.

Step 9
Turn over the paper.
Step 10
Open the paper as shown to create a small pocket. Then flatten down the sides of the pocket.
Step 11
Fold and crease in the direction of the arrow.
Step 12
Open the paper as shown to create a small pocket. Then flatten down the sides of the pocket.
Step 13
Turn over the paper.

Step 14
Fold and crease in the direction of the arrow.
Step 15
Open the paper as shown to create a small pocket. Then flatten down the sides of the pocket.
Step 16
Fold to the left. Fold the reverse side in the same manner.
Step 17
Fold the paper along the dotted line in the direction of the arrow. Fold the reverse side in the same manner.

Step 18
Fold the paper along the dotted line in the direction of the arrow. Fold the reverse side in the same manner.
Step 19
Open the paper in the direction of the arrow.
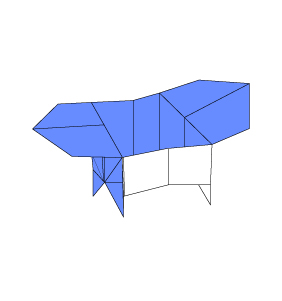
Step 20
Complete.
Conclusion:
Congratulations on completing your origami box with legs! You’ve successfully turned an ordinary piece of A4 paper into a versatile and attractive box that’s perfect for organizing your desk, storing small items, or showcasing your creativity. Experiment with different paper types and colors to personalize your design even further. Enjoy your new creation and keep exploring the endless possibilities of paper crafts. Happy folding!
Comments