
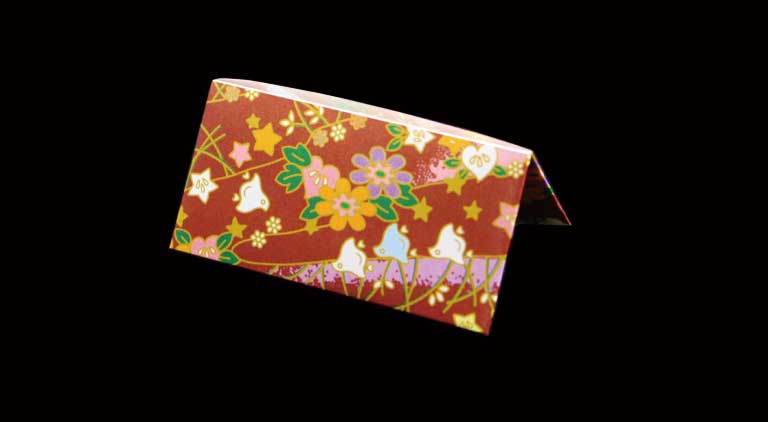
Looking for a unique and practical origami project? This origami wallet is perfect for holding cards, cash, or small notes—and it requires only one sheet of paper! No glue or cutting needed.
This step-by-step guide will show you how to make an easy origami wallet or card case in just a few minutes. Let’s get started!
How to Make an Origami Wallet (Card Case) – 5 Easy Steps
Materials Needed:
✔ A single sheet of rectangular paper (A4, letter-size, or origami paper)
✔ Your hands! No scissors or glue required.
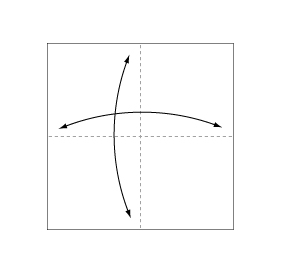
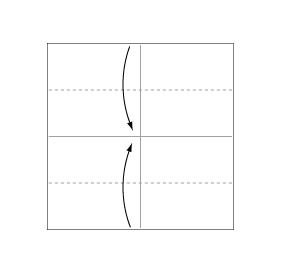
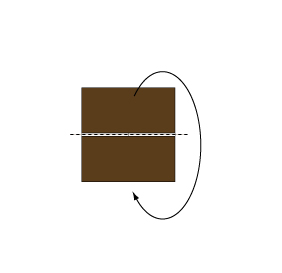
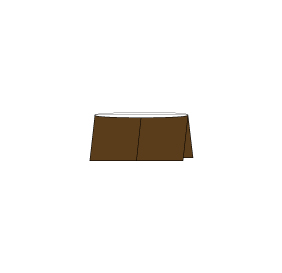
Follow these 5 easy steps to create a functional DIY paper wallet. Fold the paper in half lengthwise and crease well. Fold each side along the dotted lines toward the center. Flip the paper over and fold backward along the dotted line. Repeat the backward fold to form the wallet structure. Open up your **origami wallet**—it’s ready to use!Step-by-Step Guide: Fold Your Own Origami Wallet
Step 1
Step 2
Step 3
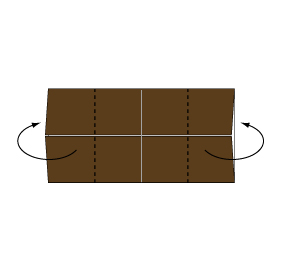
Step 4
Step 5
Customization Ideas:
🎨 Decorate your wallet with markers, stickers, or washi tape.
📏 Use larger paper for a bigger wallet.
📜 Choose thick origami paper for better durability.
Conclusion:
Your DIY origami wallet is now ready! 🎉 Use it for holding business cards, cash, or small notes. This is a great paper craft for kids and adults alike.
Would you like a printable PDF version of this tutorial? Let us know! 😊
Comments