

Learn how to fold a playful origami paper balloon turtle with our detailed step-by-step tutorial. This forever cute design transforms a single sheet of paper into a 3D turtle that you can inflate like a balloon! Perfect for family fun and creative projects, this guide makes origami exciting and interactive.
How to Make an ORIGAMI Paper Balloon Turtle
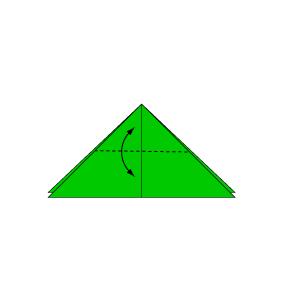
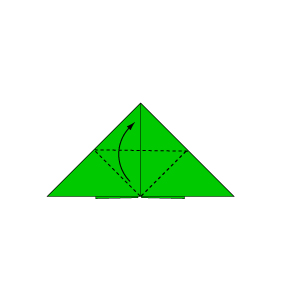
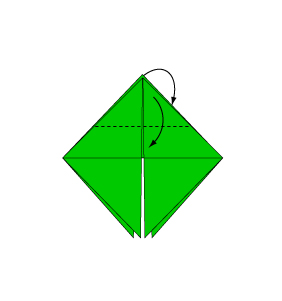
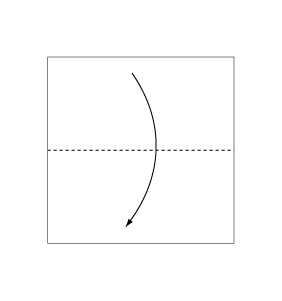 Step 1: Fold the paper along the dotted line in the direction of the arrow.
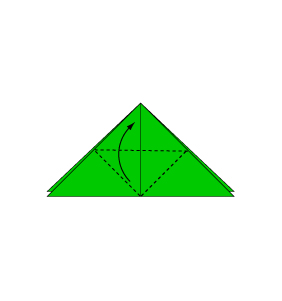
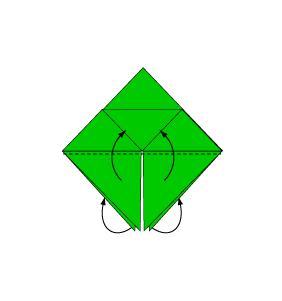
 Step 2: Fold the paper along the dotted line in the direction of the arrow.
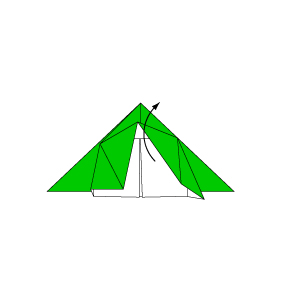
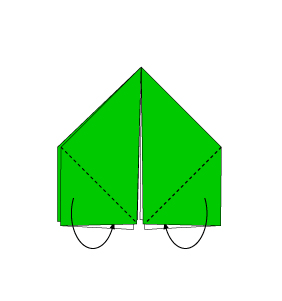
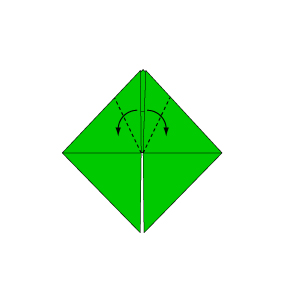
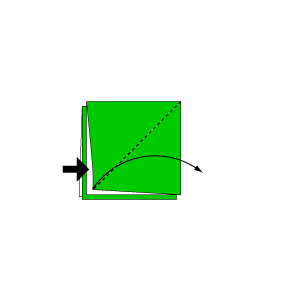 Step 3: Open the paper as shown to create a small pocket. Then flatten down the sides of the pocket.
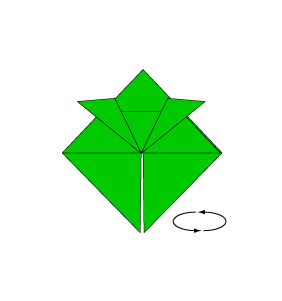
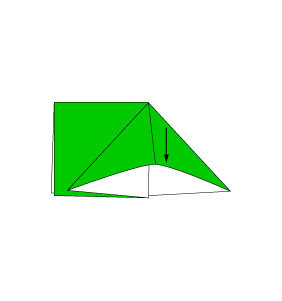 Step 4: Continue from step 3.
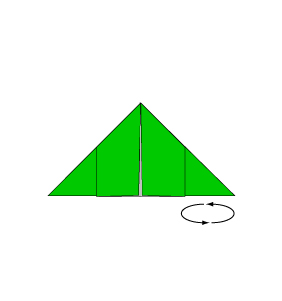
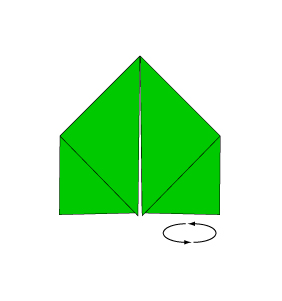
 Step 5: Turn over the paper.
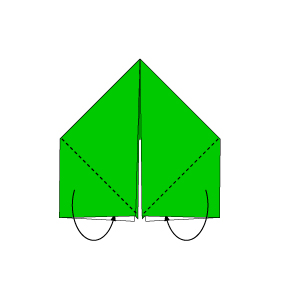
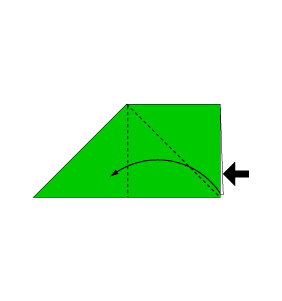 Step 6: Open the paper as shown to create a small pocket. Then flatten down the sides of the pocket.
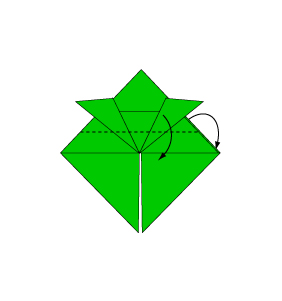
 Step 7: Fold and crease in the direction of the arrow.
 Step 8: Open the paper as shown to create a small pocket. Then flatten down the sides of the pocket.
 Step 9: Continue from step 8.
 Step 10: Turn over the paper.
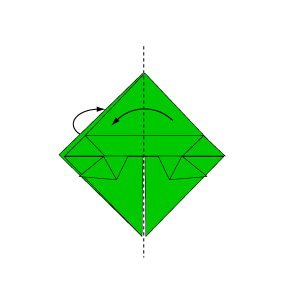
 Step 11: Open the paper as shown to create a small pocket. Then flatten down the sides of the pocket.
 Step 12: Fold the paper with the dotted line on the inside.
 Step 13: Turn over the paper.
 Step 14: Fold the paper with the dotted line on the inside.
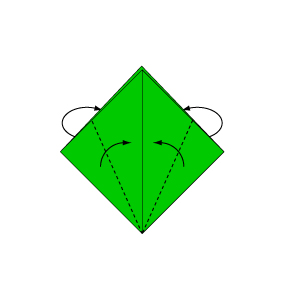
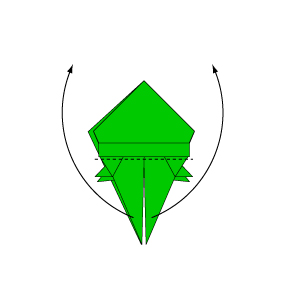
 Step 15: Fold the paper along the dotted line in the direction of the arrow. Then fold the reverse side in the same manner.
 Step 16: Fold the paper along the dotted line in the direction of the arrow. Then fold the reverse side in the same manner.
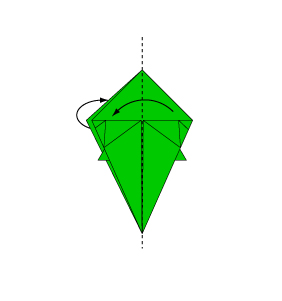
 Step 17: Fold the paper along the dotted line in the direction of the arrow.
 Step 18: Turn over the paper.
 Step 19: Fold the paper along the dotted line in the direction of the arrow.
 Step 20: Fold the paper along the dotted line in the direction of the arrow. Then fold the reverse side in the same manner.
 Step 21: Fold the paper along the dotted line in the direction of the arrow. Then fold the reverse side in the same manner.
 Step 22: Fold the paper along the dotted line in the direction of the arrow. Then fold the reverse side in the same manner.
 Step 23: Fold the paper along the dotted line in the direction of the arrow. Then fold the reverse side in the same manner.
 Step 24: Fold the paper with the dotted line on the inside.
 Step 25: Fold the paper with the dotted line on the inside.
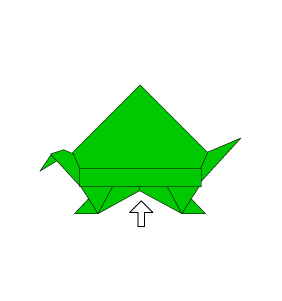 Step 26: Hold on the sides and blow air into the small hole to inflate.
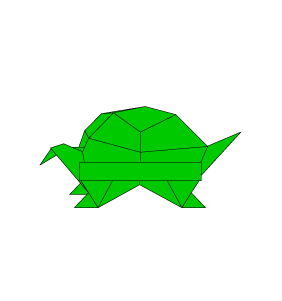 Step 27: Complete.
You’ve successfully created an origami paper balloon turtle—a delightful and interactive craft for all ages. Enjoy inflating your turtle and using it as a fun accessory or decorative piece. Happy folding, and keep the creative projects coming!
Comments