

Discover the joy of creating a Talking Crow origami toy that not only looks beautiful but moves! This traditional paper craft opens and shuts its beak, and with a few clever folds, it can even stand on its own. Perfect for a fun family project, kids will love both making it and playing with it afterwards.
DIY Talking Crow Origami Tutorial
Create a moving origami crow that opens and shuts its beak with our easy 13-step guide. Perfect for a fun family project or a crafty playtime activity!
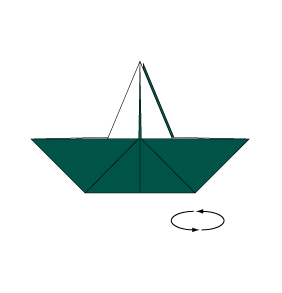
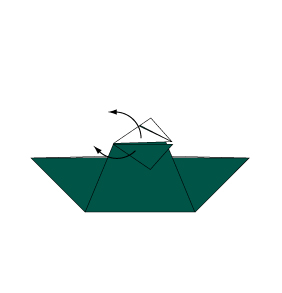
Step 1
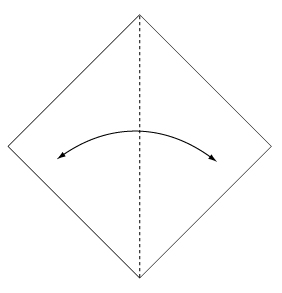
Fold and crease in the direction of the arrow.
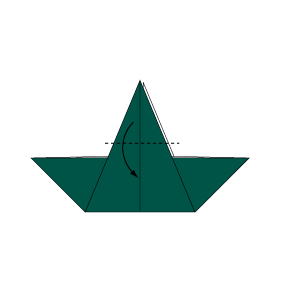
Step 2
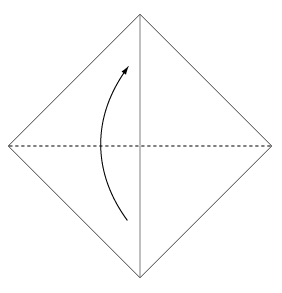
Fold the paper along the dotted line in the direction of the arrow.
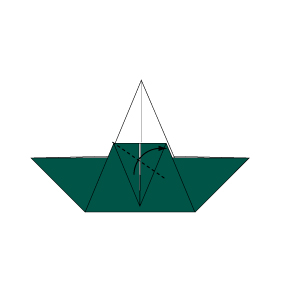
Step 3
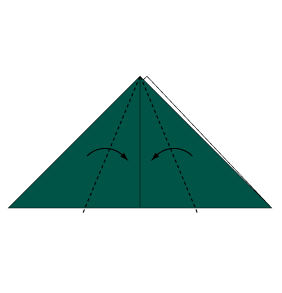
Fold the paper along the dotted line in the direction of the arrow.
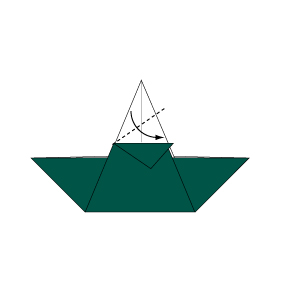
Step 4
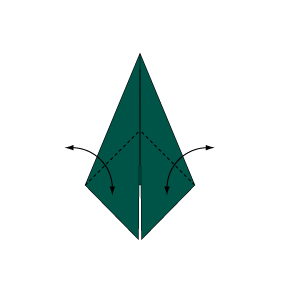
Fold the paper along the dotted line in the direction of the arrow.
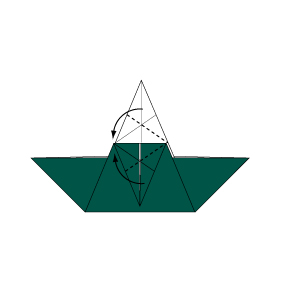
Step 5

Bring the flaps of the triangle at the bottom to the top.
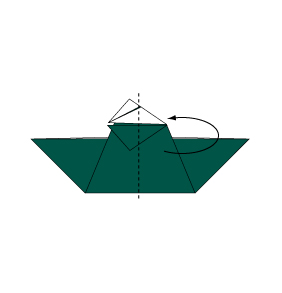
Step 6
Turn over the paper.
Step 7
Fold the paper along the dotted line in the direction of the arrow.
Step 8
Fold the paper along the dotted line in the direction of the arrow.
Step 9
Fold the paper along the dotted line in the direction of the arrow.
Step 10
Fold back in the direction of the arrows.
Step 11
Fold the paper along the dotted line in the direction of the arrow.
Step 12
Fold backwards along the dotted line.
Step 13
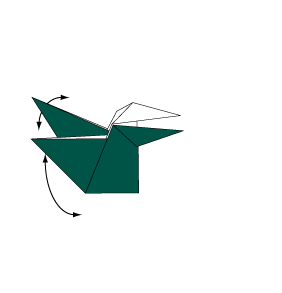
Complete your origami crow. Make the mouth move by pulling the wings to the left and right.
Congratulations on finishing your Talking Crow origami! Enjoy the playful movement and charm of this unique paper craft, perfect for sparking creativity and fun with family and friends. Happy folding and keep exploring more delightful origami projects!
Comments