

Step into the art of origami with our DIY swan tutorial. Perfect for beginners and kids, this project guides you through creating a beautiful and elegant swan using simple folds and clear diagrams. Enjoy a fun and creative craft that adds a touch of grace to any space.
How to Make an ORIGAMI Swan
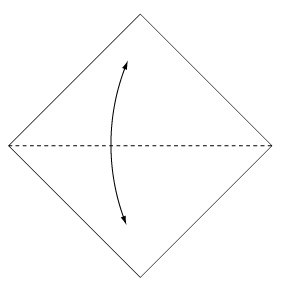 Step 1: Fold and crease in the direction of the arrow.
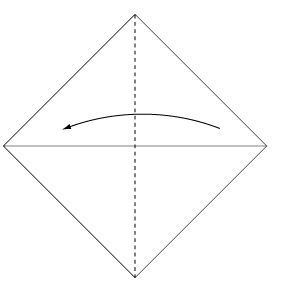 Step 2: Fold the paper along the dotted line in the direction of the arrow.
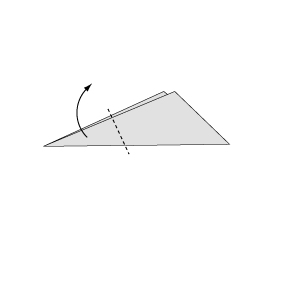
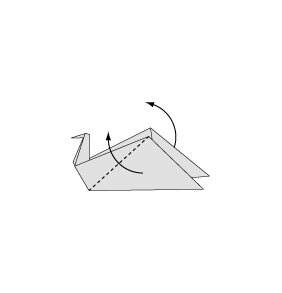
 Step 3: Fold the paper along the dotted line in the direction of the arrow.
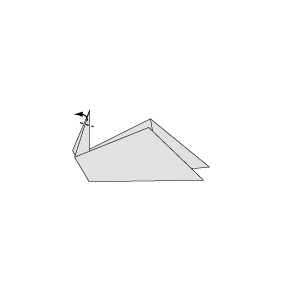
 Step 4: Fold backwards along the dotted line.
 Step 5: Fold the paper with the dotted line on the inside.
 Step 6: Fold the paper with the dotted line on the inside.
 Step 7: Fold the paper along the dotted line in the direction of the arrow.
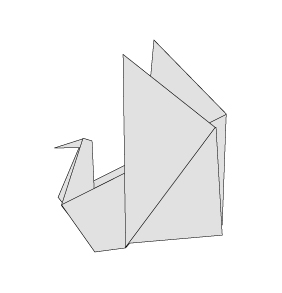 Step 8: Complete.
You’ve successfully folded an origami swan—a stunning and graceful paper craft that is perfect for decorating your home or gifting to a loved one. Enjoy the process and keep exploring more origami projects for endless creative inspiration.
Comments