

The origami samurai hat, also known as a samurai helmet, is a fantastic traditional model that’s both simple to make and fun to wear. In this tutorial, you’ll follow easy, step-by-step instructions to create your own paper samurai hat—a perfect project for craft enthusiasts of all ages.
DIY Origami Samurai Hat Tutorial
The origami samurai hat, also known as a samurai helmet, is a great traditional model that is simple to make and fun to wear!
Step 1
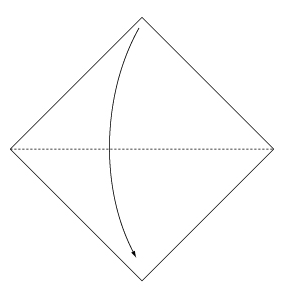 Fold the paper along the dotted line in the direction of the arrow.
Step 2
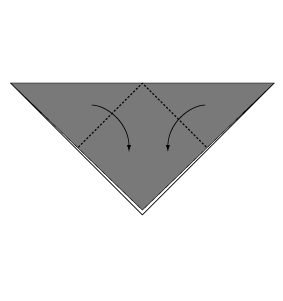 Fold the paper along the dotted line in the direction of the arrow.
Step 3
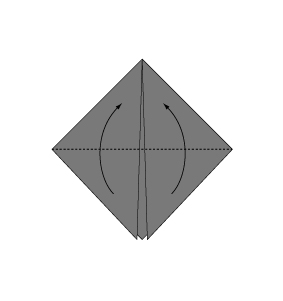 Fold the paper along the dotted line in the direction of the arrow.
Step 4
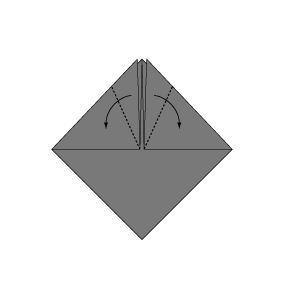 Fold the paper along the dotted line in the direction of the arrow.
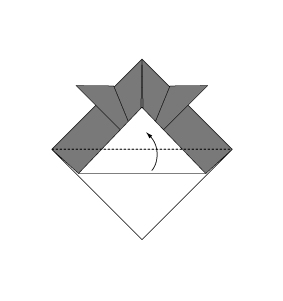
Step 5
 Fold the paper along the dotted line in the direction of the arrow.
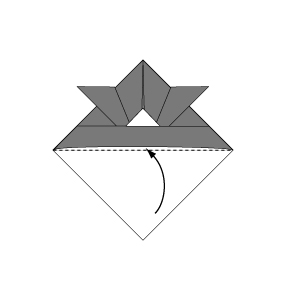
Step 6
 Fold the paper along the dotted line in the direction of the arrow.
Step 7
 Fold along the dotted line in the direction of the arrow and insert the edge into the pocket.
Step 8
 Complete your origami samurai hat.
Your origami samurai hat is now complete! Enjoy wearing or displaying this traditional paper craft and explore more samurai-themed projects, like samurai trousers, to complete your look. Happy folding and keep creating!
Comments