

Brighten your day with our detailed tutorial on creating an origami Iris. This intermediate-level project transforms colorful paper into a stunning flower that looks lovely in bunches or as festive decor. Perfect for adding a touch of elegance to your craft projects, this iris is an ideal decorative piece for your home or even a Christmas tree.
How to Make an Paper Iris
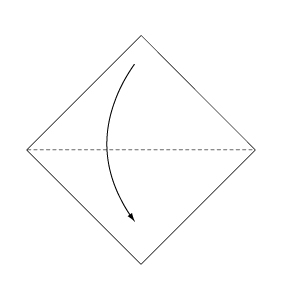 Fold the paper along the dotted line in the direction of the arrow.
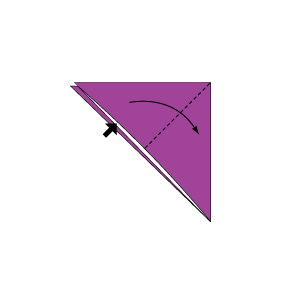
 Fold the paper along the dotted line in the direction of the arrow.
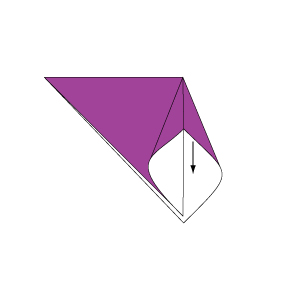
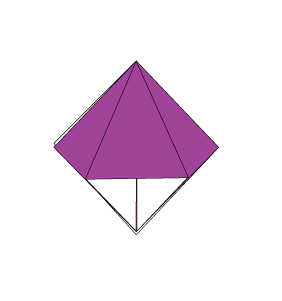
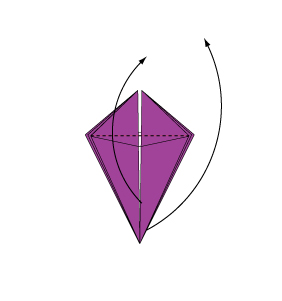
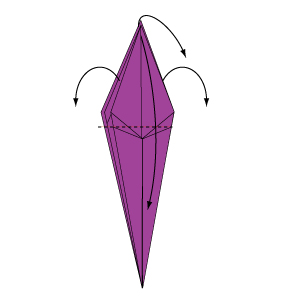
 Open the paper as shown to create a small pocket. Then flatten down the sides of the pocket.
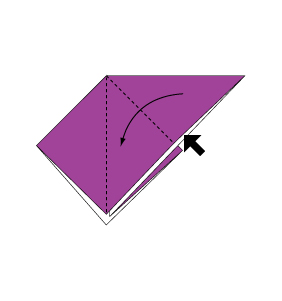
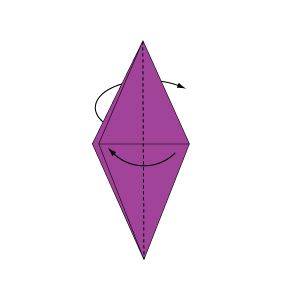
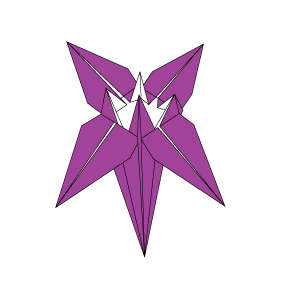
 Continue from Step 3.
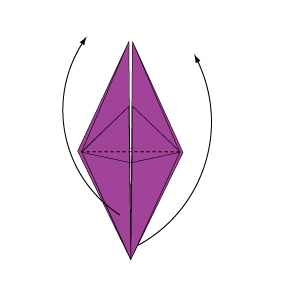
 Turn over the paper.
 Open the paper as shown to create a small pocket. Then flatten down the sides of the pocket.
 Open the paper as shown to create a small pocket. Then flatten down the sides of the pocket.
 Continue from Step 7.
 Fold the remaining three flaps in the same way.
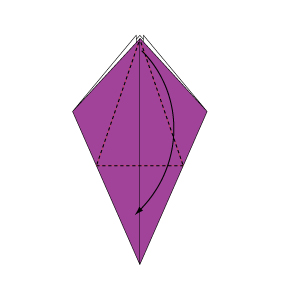
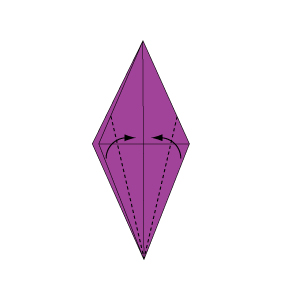
 Fold the paper along the dotted line in the direction of the arrow.
Fold the reverse side in the same manner.
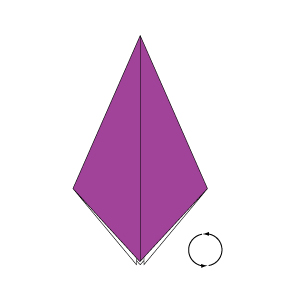 Rotate the paper 180 degrees.
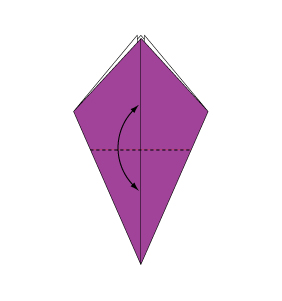 Fold and crease in the direction of the arrow.
 Open the paper as shown to create a small pocket. Then flatten down the sides of the pocket.
 Continue from Step 13.
 Fold the remaining three flaps in the same way.
 Fold the paper along the dotted line in the direction of the arrow.
Fold the reverse side in the same manner.
 Fold the paper along the dotted line in the direction of the arrow.
Fold the reverse side in the same manner.
 Fold the paper along the dotted line in the direction of the arrow.
Fold the reverse side in the same manner.
 Fold the paper along the dotted line in the direction of the arrow.
 Fold the remaining three flaps in the same way.
 Open the paper in the direction of the arrow.
 Complete.
Crafting an origami Iris is a delightful way to explore paper folding while creating a charming, decorative flower. Enjoy the process as you transform simple paper into a beautiful iris, and let it inspire your next creative project. Happy folding!
Comments