

Step into a world of creativity with our DIY origami crown tutorial. This project is ideal for kids and anyone who loves a fun, hands-on craft. Follow our clear instructions to transform a simple sheet of paper into a charming crown that adds a touch of royalty to any celebration.
How to Make an ORIGAMI Crown
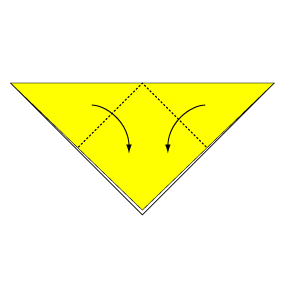
 Step 1: Fold and crease in the direction of the arrow.
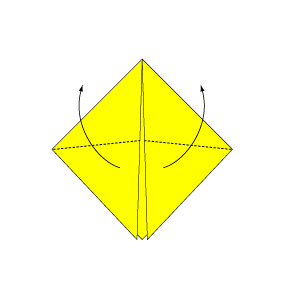
 Step 2: Fold the paper along the dotted line in the direction of the arrow.
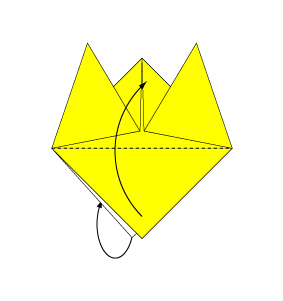
 Step 3: Fold the paper along the dotted line in the direction of the arrow.
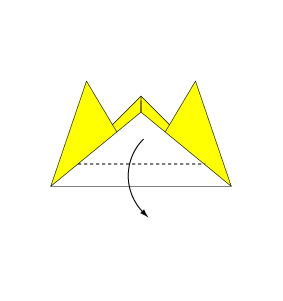
 Step 4: Fold the paper along the dotted line in the direction of the arrow, then fold the reverse side in the same manner.
 Step 5: Fold the paper along the dotted line in the direction of the arrow.
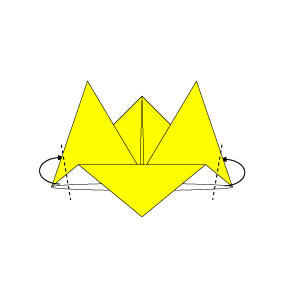 Step 6: Fold the paper with the dotted line on the inside.
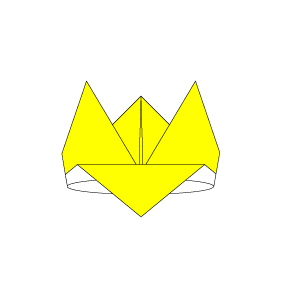 Step 7: Complete.
You’ve successfully created an origami crown—a beautiful and playful accessory that’s perfect for parties and imaginative play. Enjoy your new creation and let it inspire more creative origami projects!
Comments