
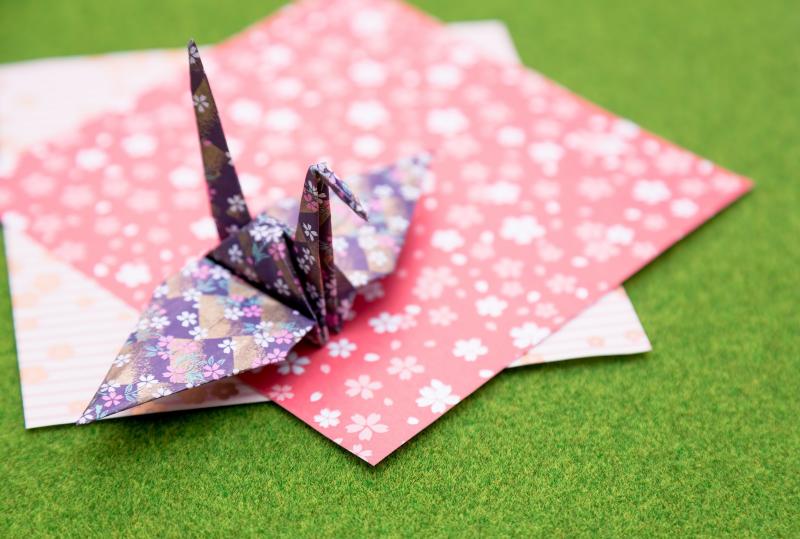
Embrace the beauty of tradition with our comprehensive origami crane tutorial. As one of the most beloved and classic models in origami, the crane represents hope and peace. Our easy-to-follow instructions make it simple to craft this stunning paper figure in just 6 minutes—an ideal project for beginners and anyone looking to experience the art of Japanese paper folding.
How to Make an ORIGAMI Crane
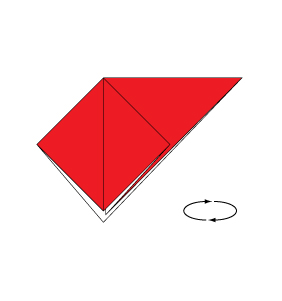
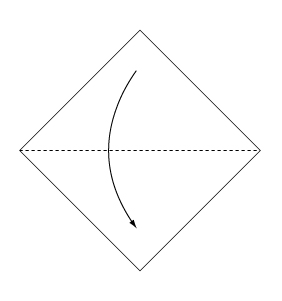 Step 1: Fold the paper along the dotted line in the direction of the arrow.
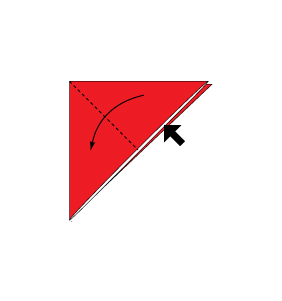
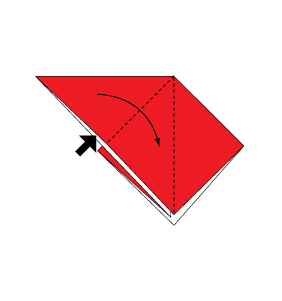
 Step 2: Fold the paper along the dotted line in the direction of the arrow.
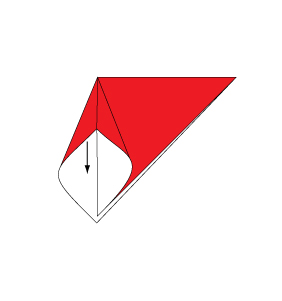
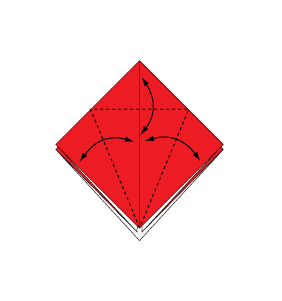
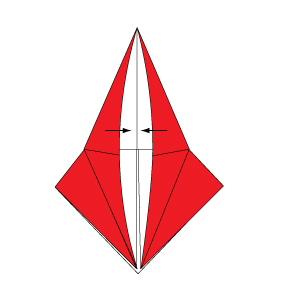
 Step 3: Open the paper as shown to create a small pocket. Then flatten down the sides of the pocket.
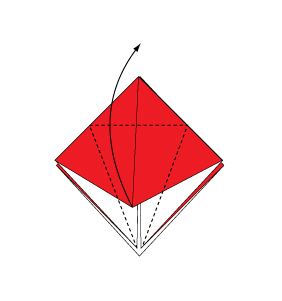
 Step 4: Continue from Step 3.
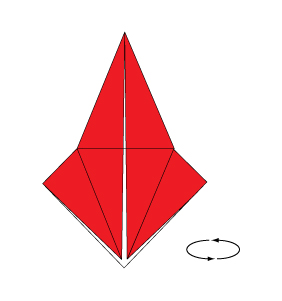
 Step 5: Turn over the paper.
 Step 6: Open the paper as shown to create a small pocket. Then flatten down the sides of the pocket.
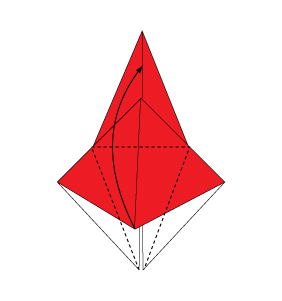
 Step 7: Fold and crease in the direction of the arrow.
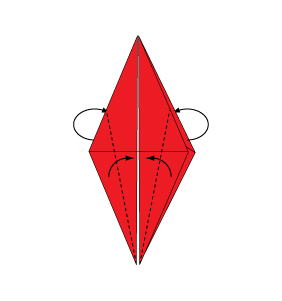
 Step 8: Open the paper as shown to create a small pocket. Then flatten down the sides of the pocket.
 Step 9: Continue from Step 8.
 Step 10: Turn over the paper.
 Step 11: Open the paper as shown to create a small pocket. Then flatten down the sides of the pocket.
 Step 12: Fold the paper along the dotted line in the direction of the arrow. Then fold the reverse side in the same manner.
 Step 13: Fold the paper with the dotted line on the inside.
 Step 14: Fold the paper with the dotted line on the inside.
 Step 15: Open the paper in the direction of the arrow. Fold the reverse side in the same manner.
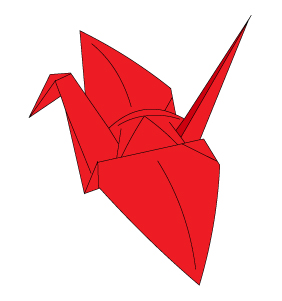 Step 16: Complete.
By following our detailed guide, you’ve created a beautiful origami crane that symbolizes the rich heritage of Japanese art. Enjoy displaying your creation or gifting it to someone special as a token of peace and hope. Keep exploring the fascinating world of origami and challenge yourself with new designs.
Comments