

Unleash your inner artist with our DIY origami cicada tutorial! This project transforms a simple sheet of paper into a stunning, realistic cicada—a model steeped in tradition and perfect for children learning origami and seniors looking for a fun cognitive challenge. Enjoy the art of paper folding and add a natural touch to your collection.
How to make an ORIGAMI Cicada
This traditional origami cicada looks very realistic and is not difficult to make. Follow these simple steps to create your own paper cicada.
Step 1
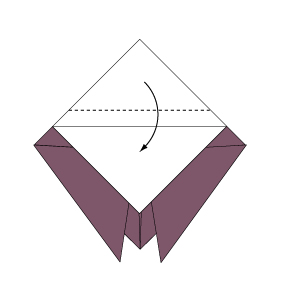
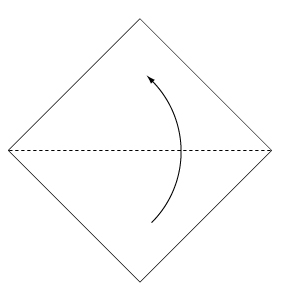 Fold the paper along the dotted line in the direction of the arrow.
Step 2
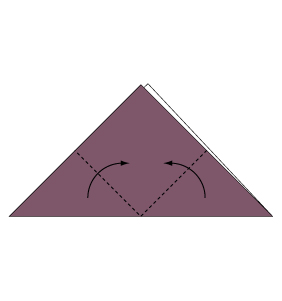 Fold the paper along the dotted line in the direction of the arrow.
Step 3
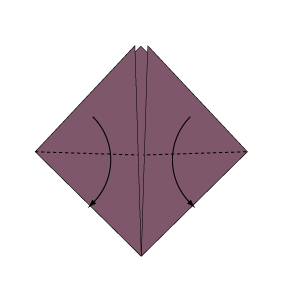 Fold the paper along the dotted line in the direction of the arrow.
Step 4
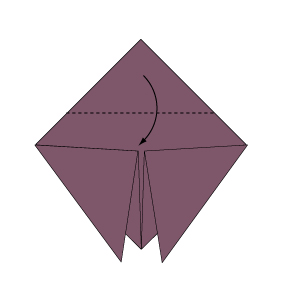 Fold the paper along the dotted line in the direction of the arrow.
Step 5
 Fold the paper along the dotted line in the direction of the arrow.
Step 6
 Fold backwards along the dotted line.
Step 7
 Complete.
Well done on crafting your origami cicada! This elegant insect not only adds a touch of nature to your decor but also provides a rewarding creative experience for kids and a stimulating activity for seniors. Celebrate your artistic success and continue exploring new origami designs!
Comments