
Elevate your dining experience with our easy origami tutorial for creating a charming chopstick wrapper. This delightful craft not only adds a touch of elegance to your table setting but also offers an engaging activity that stimulates creativity in children and sharpens the mind for seniors. Follow our step-by-step instructions and enjoy a practical yet artistic addition to your dining decor.
Step-by-Step Instructions
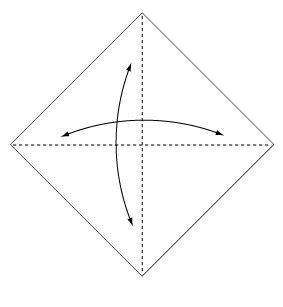 Step 1: Fold and crease in the direction of the arrow.
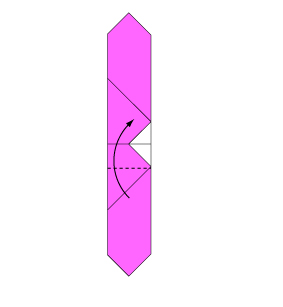
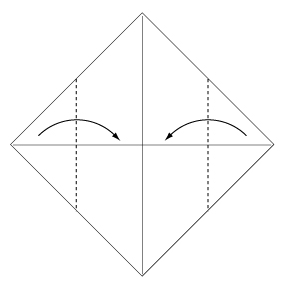 Step 2: Fold the paper along the dotted line in the direction of the arrow.
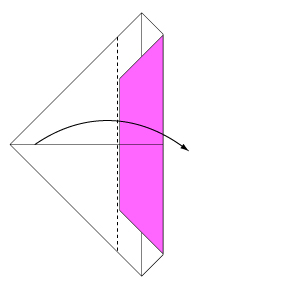
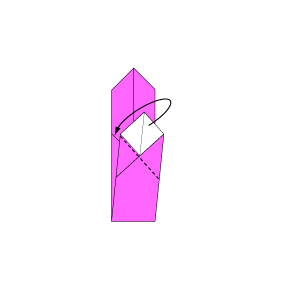
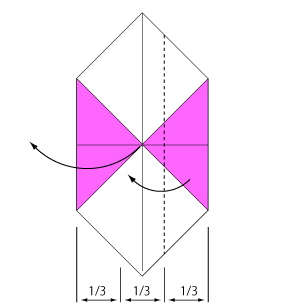 Step 3: Open out the left side, then fold the right side over to the dotted line.
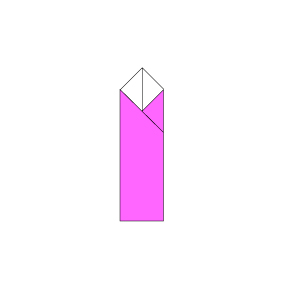
 Step 4: Fold the paper along the dotted line in the direction of the arrow.
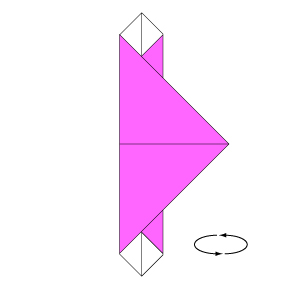 Step 5: Turn over the paper.
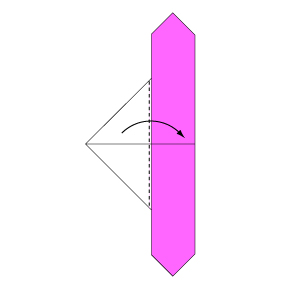 Step 6: Fold the paper along the dotted line in the direction of the arrow.
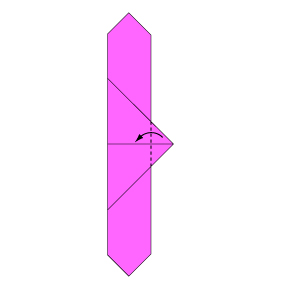 Step 7: Fold the paper along the dotted line in the direction of the arrow.
 Step 8: Fold the paper along the dotted line in the direction of the arrow.
 Step 9: Fold along the dotted line in the direction of the arrow and insert the edge into the pocket.
 Step 10: Turn over the paper.
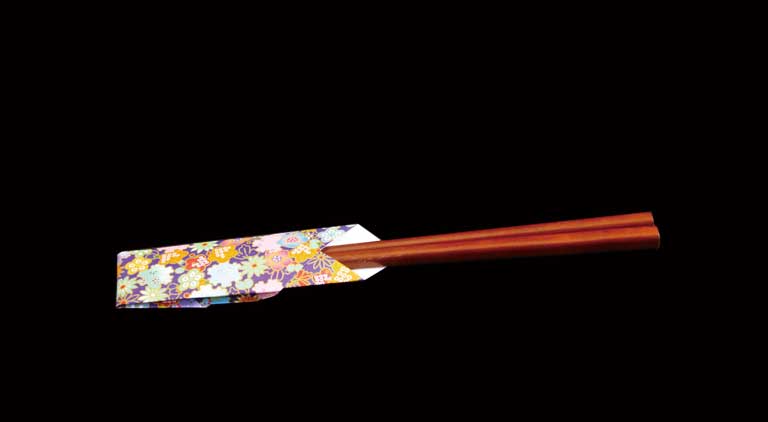
 Step 11: Your origami chopstick wrapper/holder is complete!
By following our simple origami instructions, you have crafted an elegant chopstick holder that is both decorative and functional. Perfect for entertaining guests or enjoying a mindful craft session, this project is a wonderful way to blend art with practicality. Enjoy your beautiful creation and share the joy of origami with family and friends!
Comments