

Discover the 11th installment in our popular box series! In this tutorial, we’ll show you how to transform a simple rectangular sheet—such as A4 paper—into a beautiful origami box. Perfect as a pen case or a creative gift, this project is simple enough for kids yet engaging enough for seniors looking for a fun brain exercise. With a few folds and some personal touches like stickers or drawings, you can create a practical and charming accessory that everyone will admire.
Step-by-Step Guide: Origami Box Pen Case
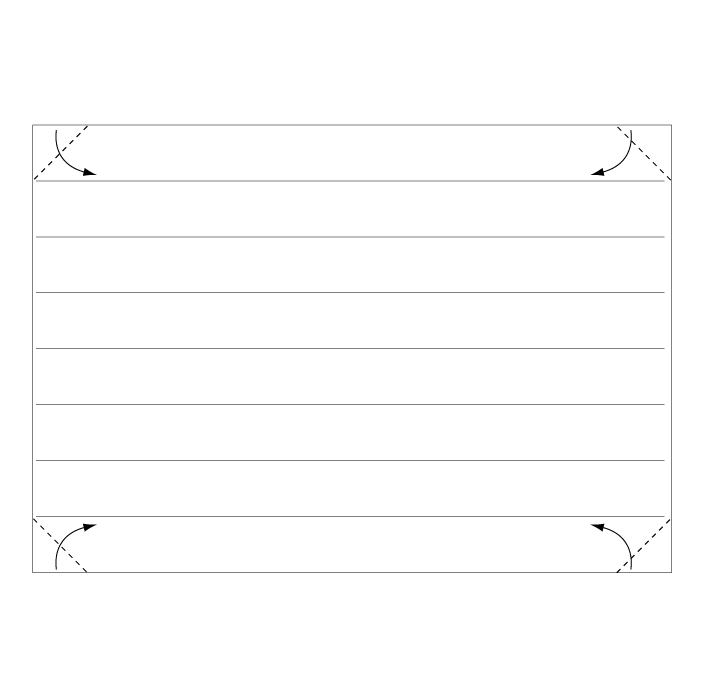
Step 1
Fold along the arrow direction to create a clear crease.

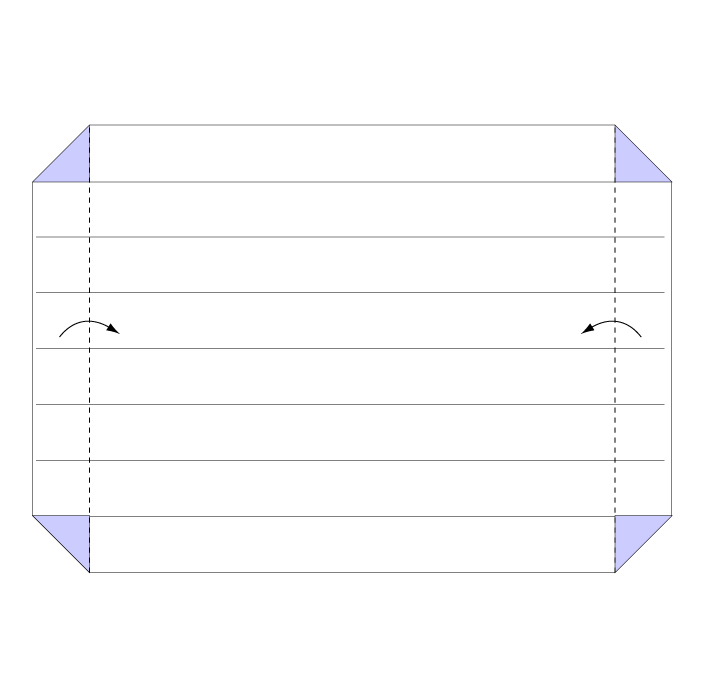
Step 2
Fold along the dotted line in the direction of the arrow.

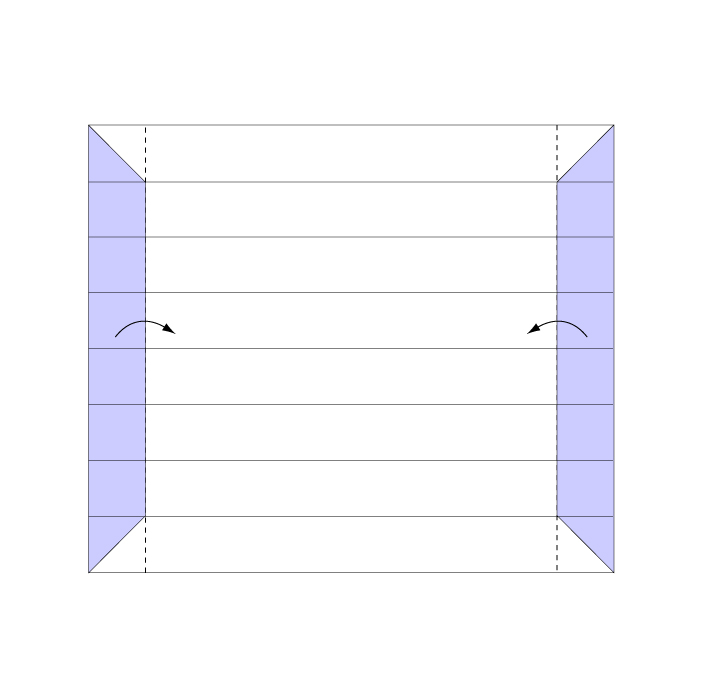
Step 3
Continue folding along the dotted line following the arrow.

Step 4
Unfold the previously folded section.

Step 5
Fold along the dotted line again in the direction of the arrow.
Step 6
Fold once more along the dotted line, ensuring a firm crease.
Step 7
Fold along the dotted line in the indicated direction.
Step 8
Fold in the arrow direction once more, ensuring the crease is set.

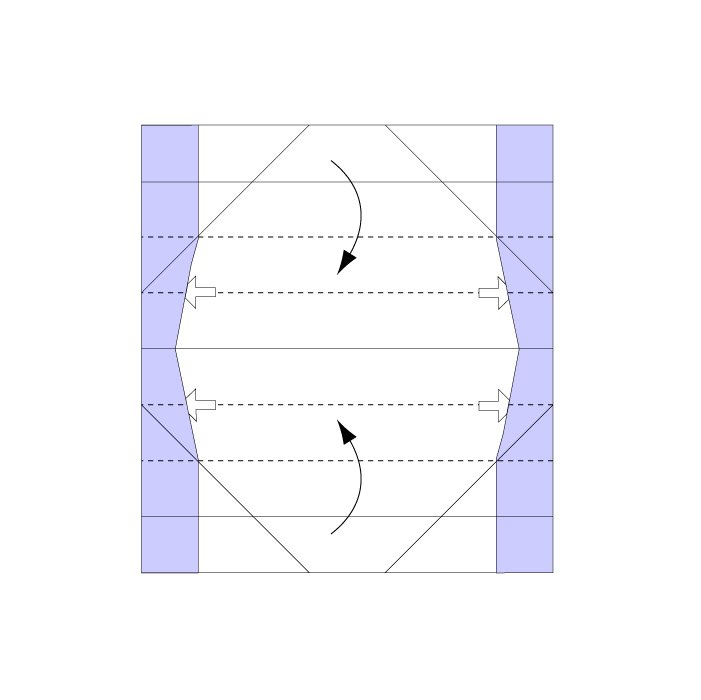
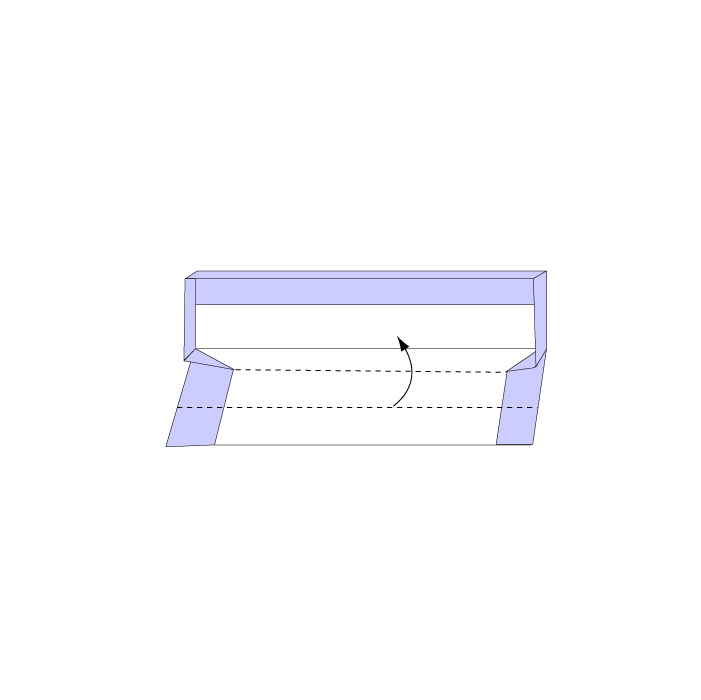
Step 9
Spread open the section indicated by the white arrow and fold the section with the black arrow inward.
Step 10
Continue from the previous step, carefully assembling the box shape.

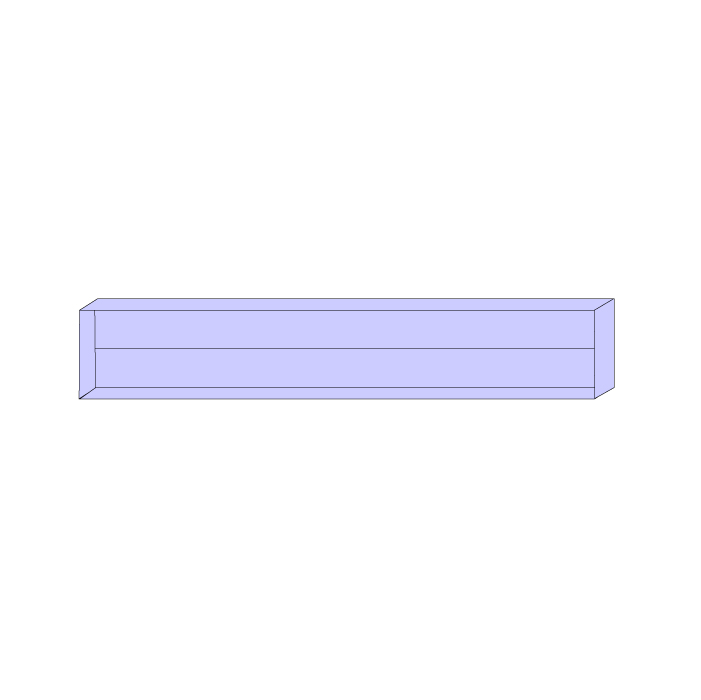
Step 11
Repeat the same folding process on the opposite side.
Step 12
Your origami box is complete!
Your elegant origami box is now complete! Not only does this project provide a creative outlet for all ages, but it also makes a practical pen case or keepsake. Enjoy crafting memories with your children or challenging your mind with this delightful origami design. Experiment with different colored or textured paper to make each box uniquely yours. Happy folding!
Comments