
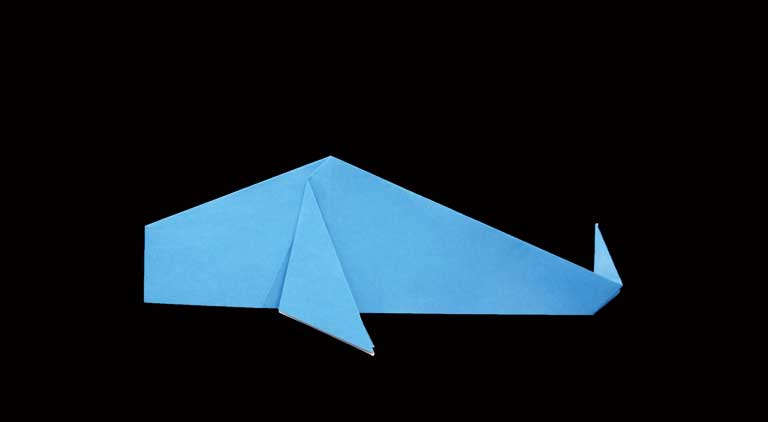
Unleash your creativity with this DIY origami carp tutorial. Designed for simplicity and beauty, this project is perfect for young learners and seniors alike. Watch as a single sheet of paper transforms into a charming fish that’s both fun to make and visually appealing—an ideal craft for fostering artistic skills and mental agility.
How to make an ORIGAMI Carp
This is one of the simplest origami models—the Origami Carp. It’s perfect for kids (an animal they can relate to) and best of all, it’s easy to make! With this 2-minute tutorial, you’ll have a pretty origami carp in no time.
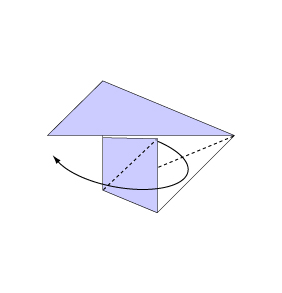
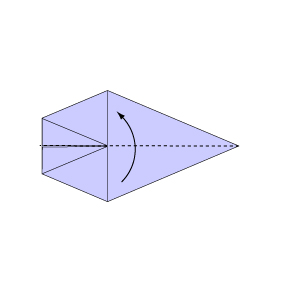
Step 1
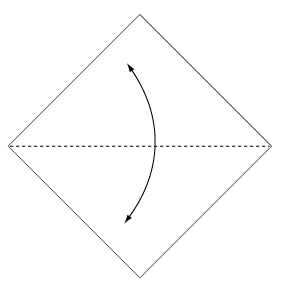 Fold and crease in the direction of the arrow.
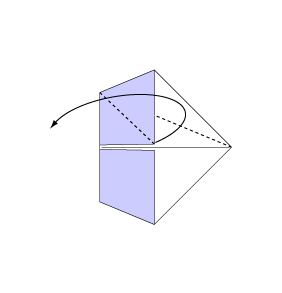
Step 2
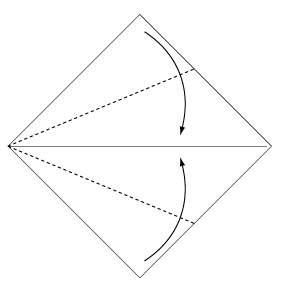 Fold the paper along the dotted line in the direction of the arrow.
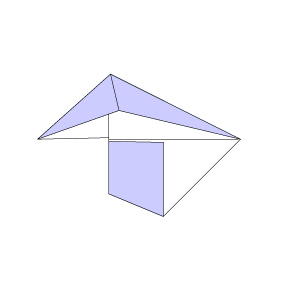
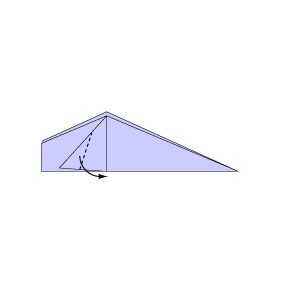
Step 3
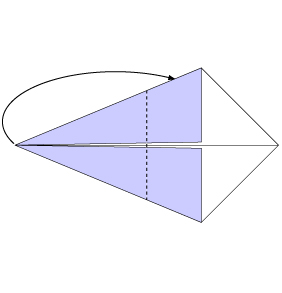 Fold backwards along the dotted line.
Step 4
 Open the paper as shown to create a small pocket, then flatten down the sides.
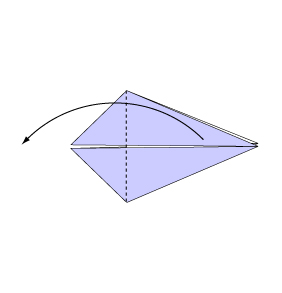
Step 5
 Continue from Step 4.
Step 6
 Do the same on the reverse side.
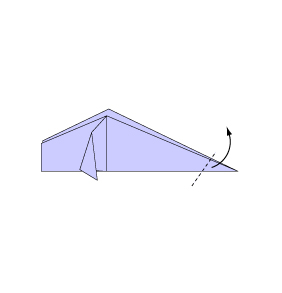
Step 7
 Fold the paper along the dotted line in the direction of the arrow.
Step 8
 Fold the paper along the dotted line in the direction of the arrow.
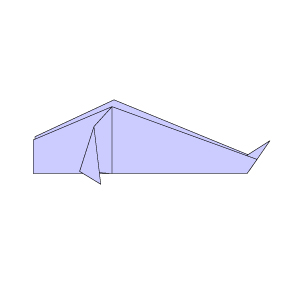
Step 9
 Fold the paper along the dotted line in the direction of the arrow.
Step 10
 Fold the paper along the dotted line in the direction of the arrow. Then, fold the reverse side in the same manner.
Step 11
 Fold the paper with the dotted line on the inside.
Step 12
 Complete.
Congratulations on creating your origami carp! This project offers a wonderful blend of art and simplicity, making it a fantastic educational activity for children and a refreshing challenge for seniors. Celebrate your achievement and keep exploring new origami crafts!
Comments