
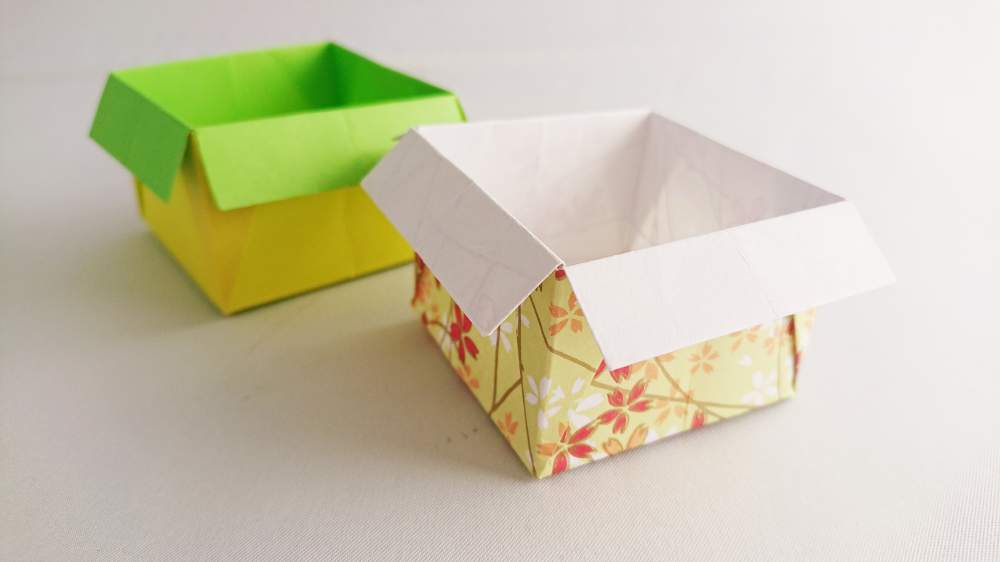
Discover why this is the most popular origami project on Origami Japan! Using beautiful, high-quality origami paper, you can easily create an elegant mini box that works perfectly as a stylish accessory for holding trinkets, candies, or even as a charming dessert plate. You can also experiment with newspapers or flyers to make a practical mini trash can. With endless creative possibilities and simple folding techniques, this timeless box design is perfect for both kids and adults. Challenge yourself and enjoy the art of origami with this versatile project!
How to Make an ORIGAMI Paper Box
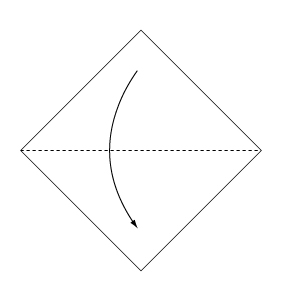
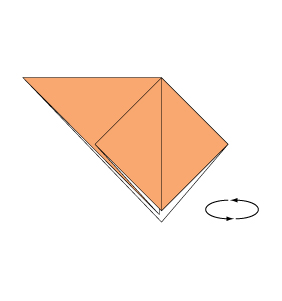
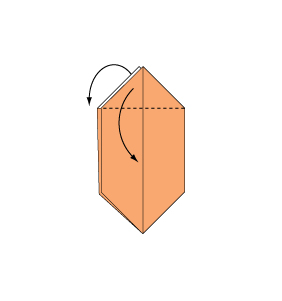
Step 1
Fold the paper along the dotted line in the direction of the arrow.
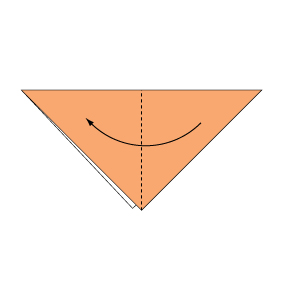
Step 2
Fold the paper along the dotted line in the direction of the arrow.
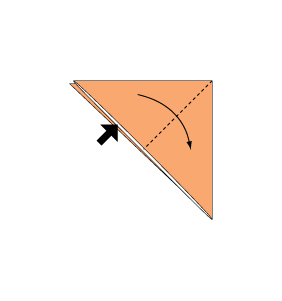
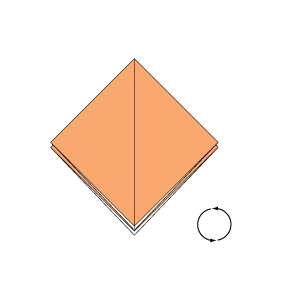
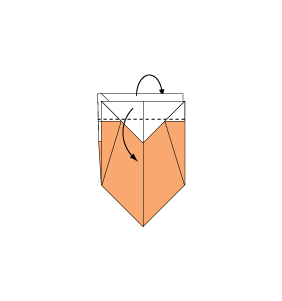
Step 3
Open the paper as shown to create a small pocket. Then flatten the sides of the pocket.
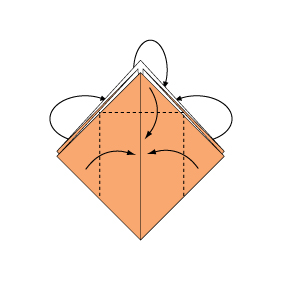
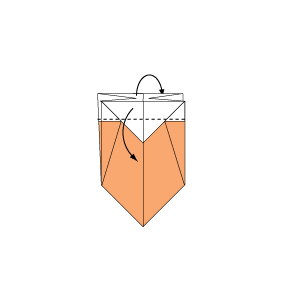
Step 4
Continue from Step 3 to further form the pocket.

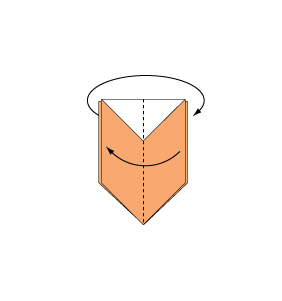
Step 5
Turn over the paper.
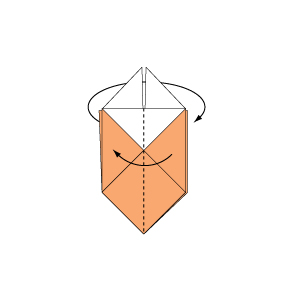
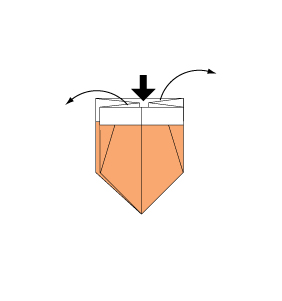
Step 6
Open the paper as shown to create a small pocket. Then flatten the sides of the pocket.

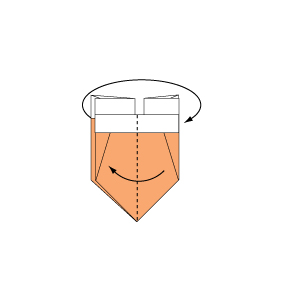
Step 7
Rotate the paper 180 degrees.
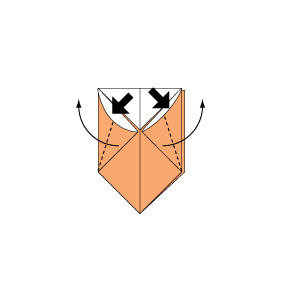
Step 8
Fold the paper along the dotted line in the direction of the arrow, then fold the reverse side in the same manner.
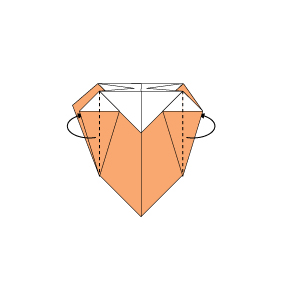
Step 9
Fold the paper along the dotted line in the direction of the arrow, and fold the reverse side similarly.
Step 10
Fold the paper along the dotted line in the direction of the arrow; repeat on the reverse side.
Step 11
Fold the paper along the dotted line in the direction of the arrow, again folding the reverse side similarly.
Step 12
Open the paper as shown to form a small pocket, then flatten the sides. Repeat for the reverse side.
Step 13
Fold backwards along the dotted line, and do the same on the reverse side.
Step 14
Fold the paper along the dotted line in the direction of the arrow; repeat on the reverse side.
Step 15
Fold the paper along the dotted line in the direction of the arrow; again, fold the reverse side similarly.
Step 16
Fold the paper along the dotted line in the direction of the arrow; also fold the reverse side in the same way.
Step 17
Open the paper in the direction of the arrow.
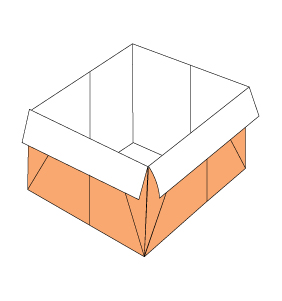
Step 18
Your origami box is complete!
Conclusion:
Your DIY ORIGAMI Paper Box 6 is now complete! Whether you’re using decorative origami paper for a refined look or repurposing everyday paper for a practical solution, this box is as versatile as it is beautiful. Use it to store small items, serve as a chic candy dish, or even as a creative gift box. With a little practice, you can master this classic design and explore countless variations. Happy folding and enjoy your new favorite origami craft!
Comments