

Experience the art of origami with our step-by-step tutorial for creating a beautiful paper bird using just one square. This project not only cultivates creativity in kids but also serves as an enjoyable brain exercise for seniors. Let your imagination take flight as you follow our easy instructions to make a truly elegant origami bird.
How to make an ORIGAMI Bird
Using just one square of origami paper, you can create a beautiful work of art. Follow these steps to craft your very own elegant paper bird.
Step 1
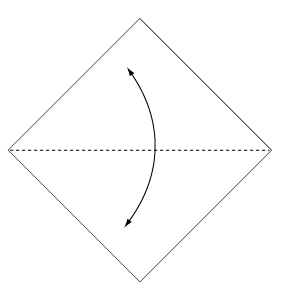 Fold and crease in the direction of the arrow.
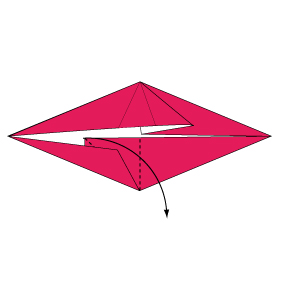
Step 2
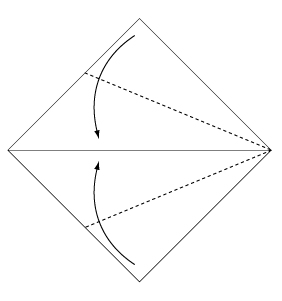 Fold the paper along the dotted line in the direction of the arrow.
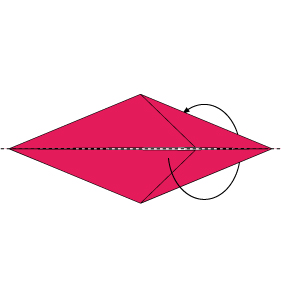
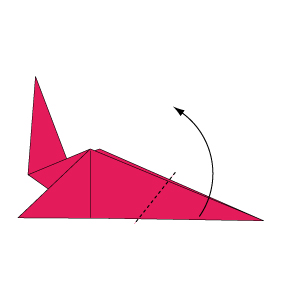
Step 3
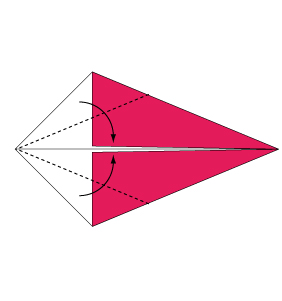 Fold the paper along the dotted line in the direction of the arrow.
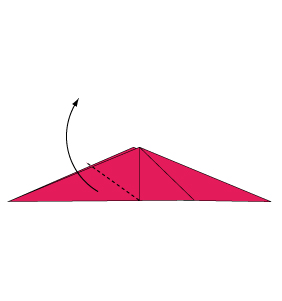
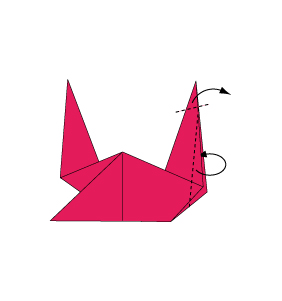
Step 4
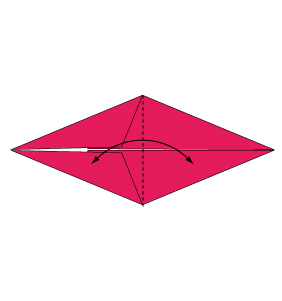 Fold and crease in the direction of the arrow.
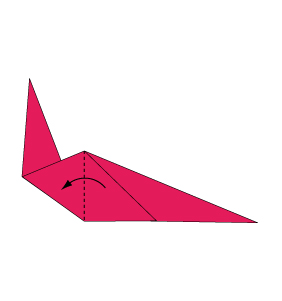
Step 5
 Open the paper as shown to create a small pocket. Then flatten down the sides of the pocket.
Step 6
 Continue from Step 5.
Step 7
 Do the same on the reverse side.
Step 8
 Fold backwards along the dotted line.
Step 9
 Fold the paper with the dotted line on the inside.
Step 10
 Fold the paper along the dotted line in the direction of the arrow. Also, fold the reverse side in the same manner.
Step 11
 Fold the paper with the dotted line on the inside.
Step 12
 Fold the paper with the dotted line on the inside.
Step 13
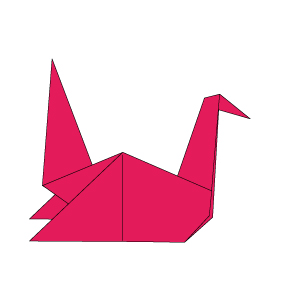 Complete.
Your origami bird is complete—a gorgeous piece of art that reflects your creativity. This project is an excellent tool for enhancing children’s artistic skills and providing seniors with a stimulating mental workout. Enjoy your elegant creation and keep exploring new origami ideas!
Comments