

Discover how to create a super cute origami whale that’s perfect for any Finding Dory fan! This easy, step-by-step tutorial guides you through folding a traditional origami whale in just a few minutes. With clear diagrams and simple instructions, this project is ideal for beginners and fun for the whole family.
How to Make an ORIGAMI Whale
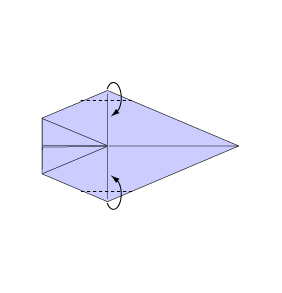
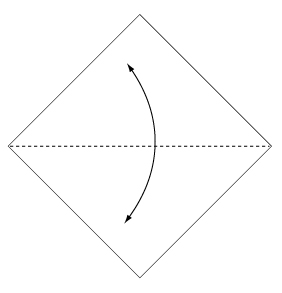 Step 1: Fold and crease in the direction of the arrow.
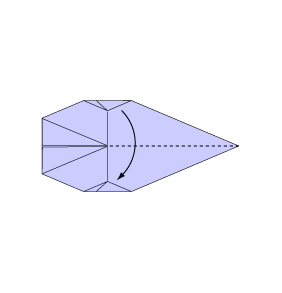
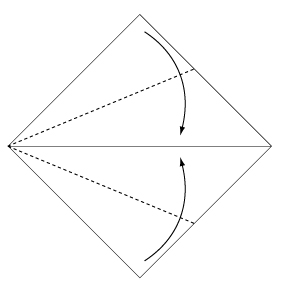 Step 2: Fold the paper along the dotted line in the direction of the arrow.
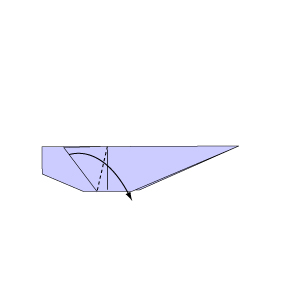
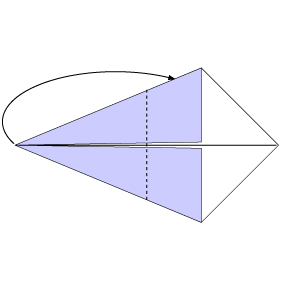 Step 3: Fold backwards along the dotted line.
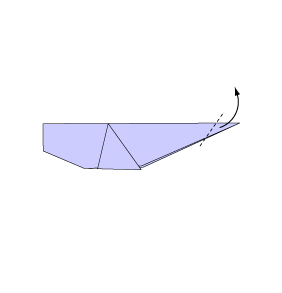
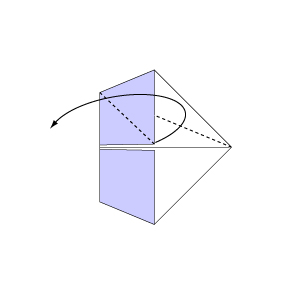 Step 4: Open the paper as shown to create a small pocket. Then flatten down the sides of the pocket.
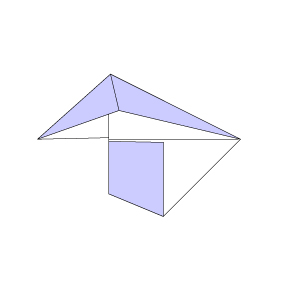 Step 5: Continue from Step 4.
 Step 6: Do the same on the reverse side.
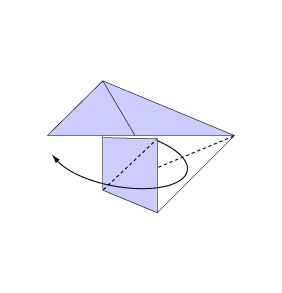
 Step 7: Open the paper in the direction of the arrow.
 Step 8: Fold the paper along the dotted line in the direction of the arrow.
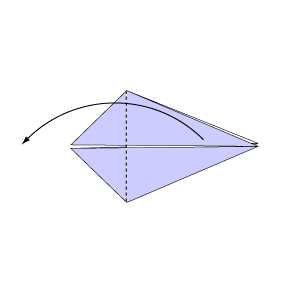
 Step 9: Fold the paper along the dotted line in the direction of the arrow.
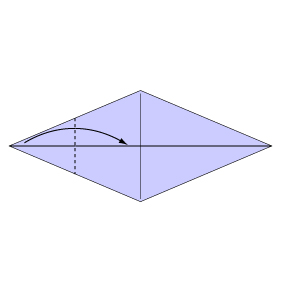
 Step 10: Fold in half along the dotted line.
 Step 11: Fold the paper along the dotted line in the direction of the arrow. Then fold the reverse side in the same manner.
 Step 12: Fold the paper with the dotted line on the outside.
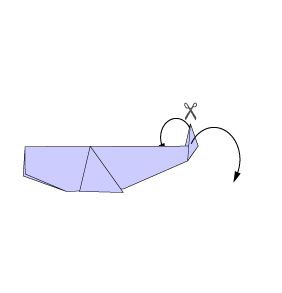 Step 13: Make a slight cut on the end and pull the two halves apart gently to form a tail.
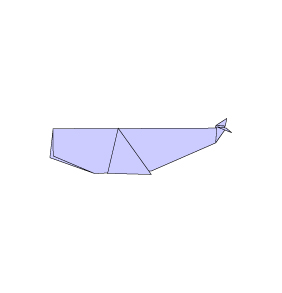 Step 14: Complete.
Congratulations on crafting your very own origami whale! Enjoy this playful paper creation as a decorative piece or a fun gift. Keep exploring more origami projects to add a splash of creativity to your world.
Comments