

The origami turtle is a charming model that’s both simple to make and wonderfully cute. This step-by-step tutorial guides you through folding an adorable paper turtle, perfect for beginners and anyone who loves creative crafts.
DIY Origami Turtle Tutorial
The origami turtle is a great little model—easy to make and oh so cute! Follow our simple step-by-step guide to craft your own adorable paper turtle.
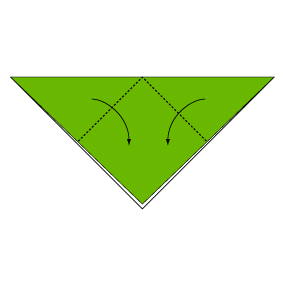
Step 1

Fold the paper along the dotted line in the direction of the arrow.
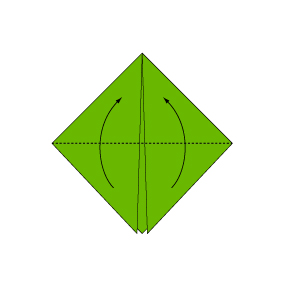
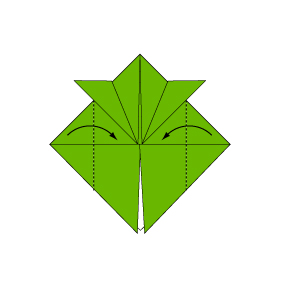
Step 2
Fold the paper along the dotted line in the direction of the arrow.
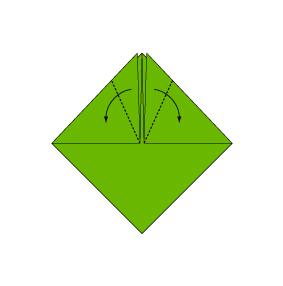
Step 3
Fold the paper along the dotted line in the direction of the arrow.
Step 4
Fold the paper along the dotted line in the direction of the arrow.
Step 5
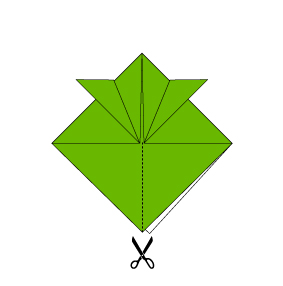
Cut along the dotted line.
Step 6
Fold the paper along the dotted line in the direction of the arrow.
Step 7

Fold the paper along the dotted line in the direction of the arrow.
Step 8

Fold the paper along the dotted line in the direction of the arrow.
Step 9

Fold the paper along the dotted line in the direction of the arrow.
Step 10
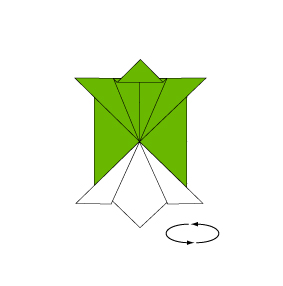
Turn over the paper.
Step 11

Your origami turtle is complete!
Congratulations on completing your origami turtle! Enjoy this delightful paper craft that adds a touch of whimsy to any space. Happy folding, and keep exploring more fun origami projects!
Comments