

The origami cute small bird is one of the easiest models to make, yet so much fun! In this tutorial, you’ll learn how to fold a charming paper bird with simple, easy-to-follow steps. Whether you’re a beginner or crafting with friends and family, enjoy creating this delightful model.
DIY Origami Cute Small Bird Tutorial
The origami cute small bird is one of the easiest models to make, yet so much fun! Follow these simple steps and enjoy creating your own adorable paper bird.
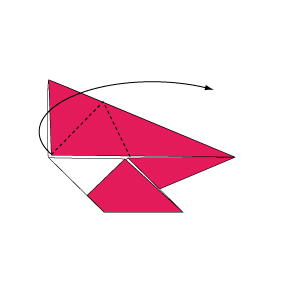
Step 1
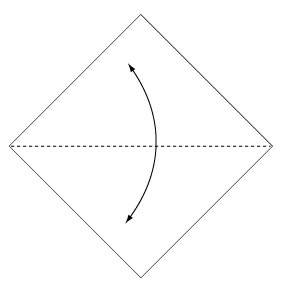
Fold and crease in the direction of the arrow.
Step 2
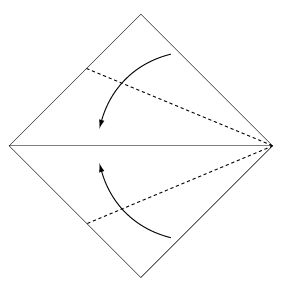
Fold the paper along the dotted line in the direction of the arrow.
Step 3
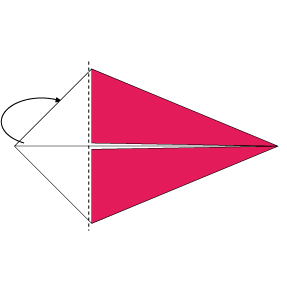
Fold backwards along the dotted line.
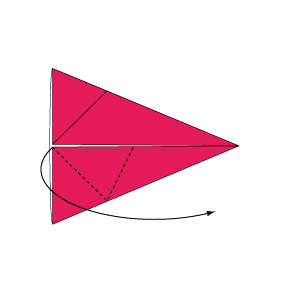
Step 4

Fold and crease in the direction of the arrow.
Step 5
Open the paper as shown to create a small pocket, then flatten down the sides of the pocket.
Step 6

Continue from Step 5.
Step 7
Do the same on the reverse side.
Step 8

Fold the paper along the dotted line in the direction of the arrow.
Step 9

Fold the paper along the dotted line in the direction of the arrow.
Step 10

Fold the paper along the dotted line in the direction of the arrow.
Step 11
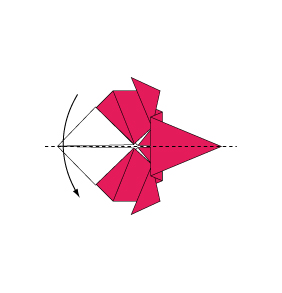
Fold in half along the dotted line.
Step 12
Fold the paper with the dotted line on the inside.
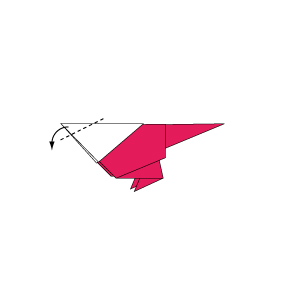
Step 13

Pull out the left side of the triangle to create a tail and a neck. Then press down hard on the body to secure.
Step 14
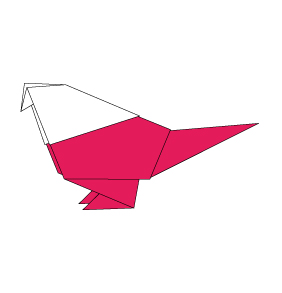
Your origami small bird is complete!
Your origami small bird is now complete! Enjoy this adorable paper craft that’s perfect for brightening up your space or gifting to someone special. Happy folding, and keep exploring more creative origami projects!
Comments