
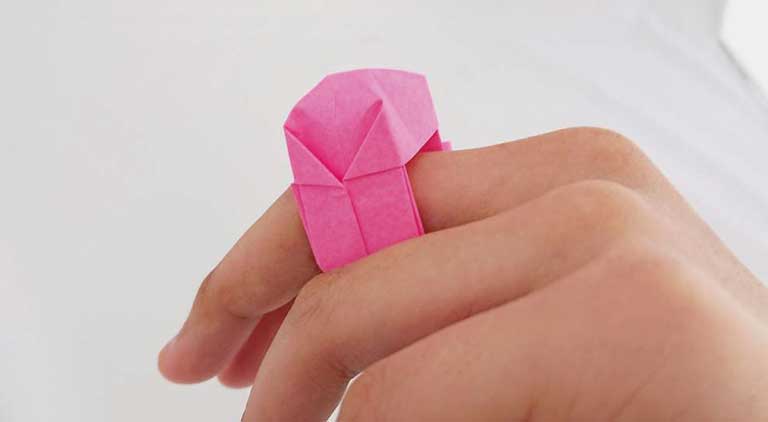
How about giving a unique gift this Valentine’s Day? Make your very own special origami ring—a playful piece of paper jewelry that’s a heartfelt gesture for your sweetheart. This tutorial shows you how to create an origami ring in just 2 minutes!
DIY Origami Ring Tutorial
Step 1
 Cut along the dotted line.
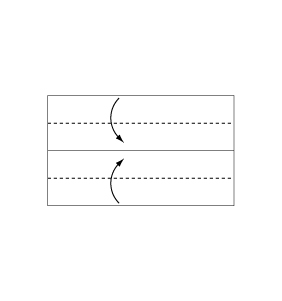
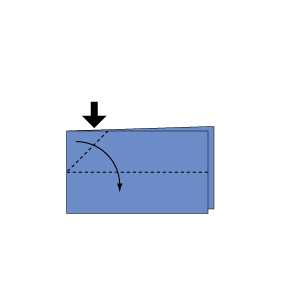
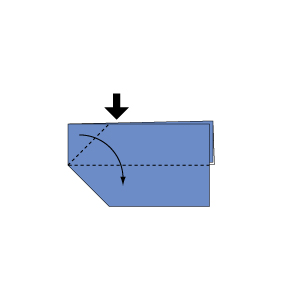
Step 2
 Fold and crease in the direction of the arrow.
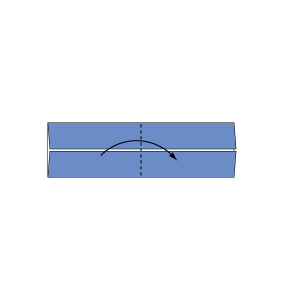
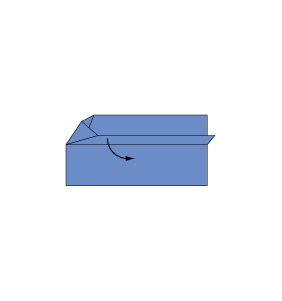
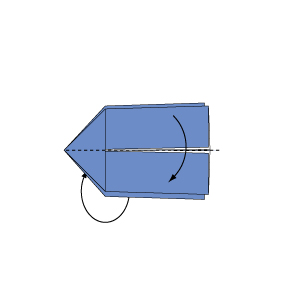
Step 3
 Fold the paper along the dotted line in the direction of the arrow.
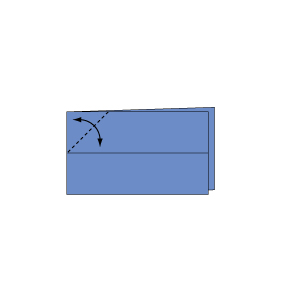
Step 4
 Fold the paper along the dotted line in the direction of the arrow.
Step 5
 Fold and crease in the direction of the arrow.
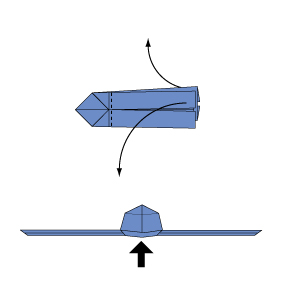
Step 6
 Open the paper as shown to create a small pocket. Then flatten down the sides of the pocket.
Step 7
 Continue from Step 6.
Step 8
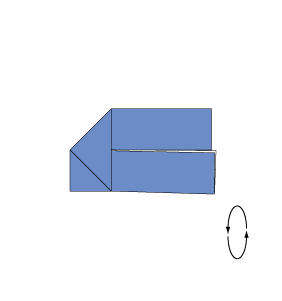 Turn over the paper.
Step 9
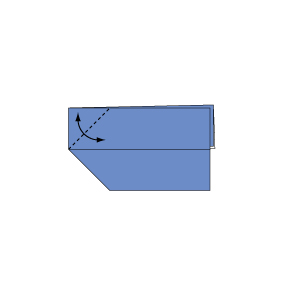 Fold and crease in the direction of the arrow.
Step 10
 Open the paper as shown to create a small pocket. Then flatten down the sides of the pocket.
Step 11
 Fold the paper along the dotted line in the direction of the arrow and fold the reverse side in the same manner.
Step 12
 Fold the paper along the dotted line in the direction of the arrow and fold the reverse side in the same manner.
Step 13
 Open the paper in the direction of the arrow.
Step 14
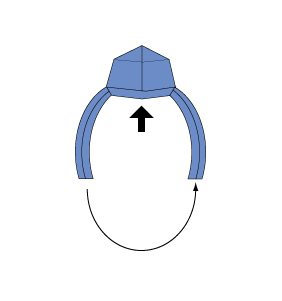 Join the two halves together to form a ring.
Step 15
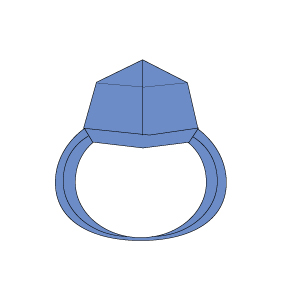 Your origami ring is complete!
Learn how to make an origami ring with our easy, step-by-step tutorial. Create a unique, handmade jewelry gift for Valentine’s Day in just 2 minutes. Perfect for a heartfelt gesture of love!
Comments