
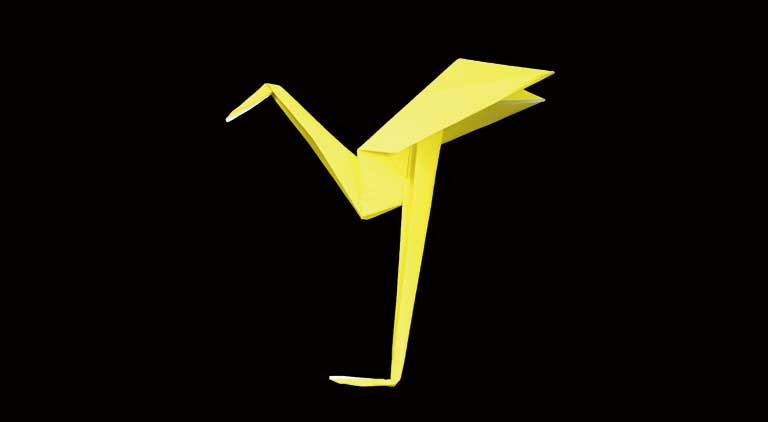
Here’s an excellent origami heron—a beautiful piece of art that’s both easy and fun to create. This step-by-step tutorial uses clear diagrams and instructions that even children can follow, making it perfect for beginners and art lovers alike.
DIY Origami Heron Tutorial
Discover how to fold a stunning origami heron with our easy-to-follow guide. Perfect for beginners, kids, and anyone who loves beautiful paper art!
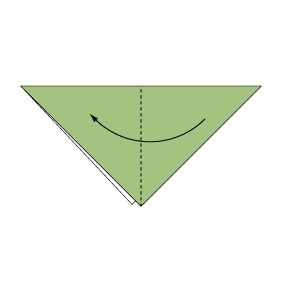
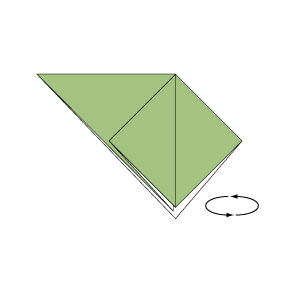
Step 1
 Fold the paper along the dotted line in the direction of the arrow.
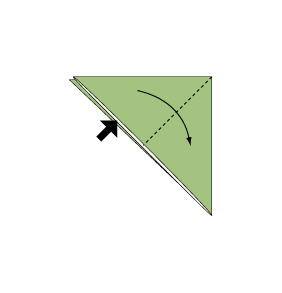
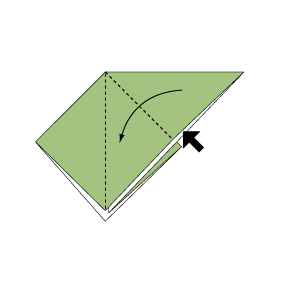
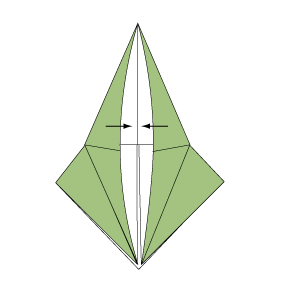
Step 2
 Fold the paper along the dotted line in the direction of the arrow.
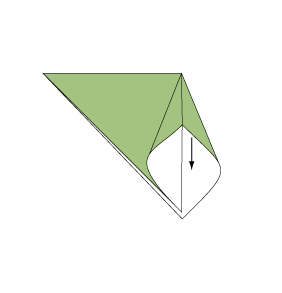
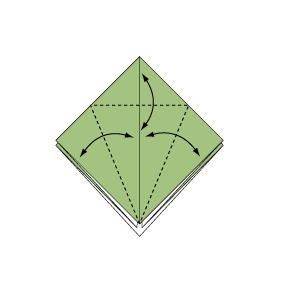
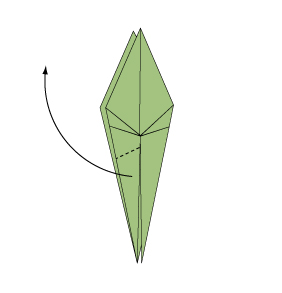
Step 3
 Open the paper as shown to create a small pocket, then flatten down the sides of the pocket.
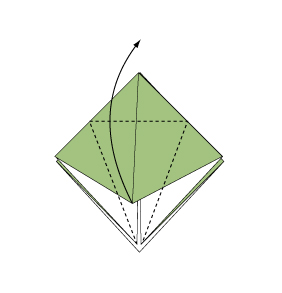
Step 4
 Continue from Step 3.
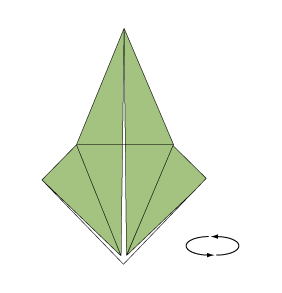
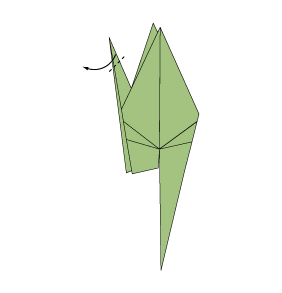
Step 5
 Turn over the paper.
Step 6
 Open the paper as shown to create a small pocket, then flatten down the sides of the pocket.
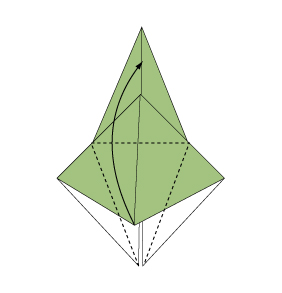
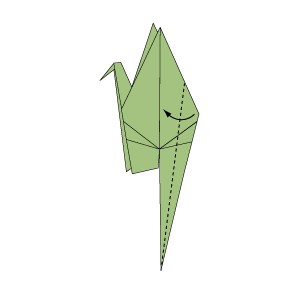
Step 7
 Fold and crease in the direction of the arrow.
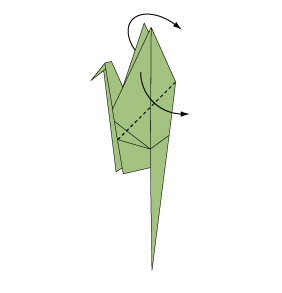
Step 8
 Open the paper as shown to create a small pocket, then flatten down the sides of the pocket.
Step 9
 Continue from Step 8.
Step 10
 Turn over the paper.
Step 11
 Open the paper as shown to create a small pocket, then flatten down the sides of the pocket.
Step 12
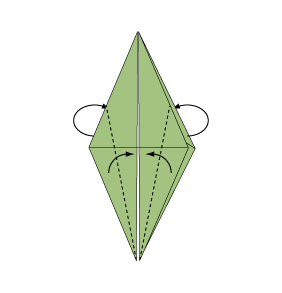 Fold the paper along the dotted line in the direction of the arrow, and then fold the reverse side in the same manner.
Step 13
 Fold the paper with the dotted line on the inside.
Step 14
 Fold the paper with the dotted line on the inside.
Step 15
 Fold the paper along the dotted line in the direction of the arrow and fold the reverse side in the same manner.
Step 16
 Fold the paper along the dotted line in the direction of the arrow and fold the reverse side in the same manner.
Step 17
 Fold the paper with the dotted line on the inside.
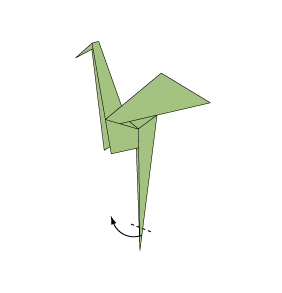
Step 18
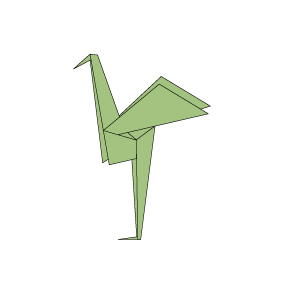 Your origami heron is now complete!
Congratulations on completing your origami heron! Enjoy the beauty of your handcrafted paper art—a delightful craft that brings joy to both young and old. Share your creation and keep exploring more origami projects for endless creative fun.
Comments