
Discover how to turn everyday newspaper, flyer inserts, or advertisement sheets into a practical paper trash can in just 15 simple steps! This clever design is not only quick—taking as little as 30 seconds once you get the hang of it—but it’s also perfectly sized for collecting food peels, snack wrappers, or other small waste. Whether you need a mini trash bin for your desk or a larger container for organic waste, this tutorial offers a fun, eco-friendly solution for everyone.
Step-by-Step Guide: Paper Trash Can from Newspaper & Flyers
Learn how to turn everyday newspaper into a functional box with our easy, step-by-step guide. This eco-friendly project repurposes old newspapers into a sturdy container ideal for storage or as a mini trash can. Perfect for beginners and a fun activity to enjoy with kids, you’ll quickly see how a simple sheet of newspaper can be transformed into a stylish, practical box!
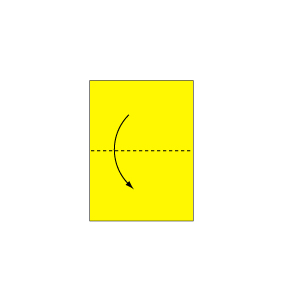
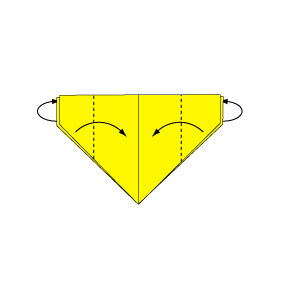
Step 1
Fold along the dotted arrow lines to create a crisp crease.

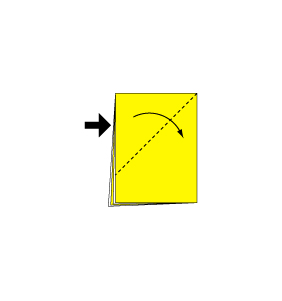
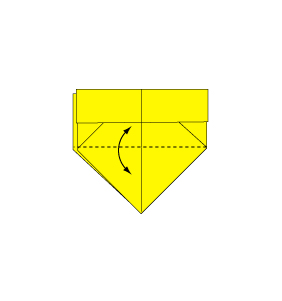
Step 2
Fold again along the dotted line in the direction of the arrow.
Step 3
Repeat the dotted line fold along the arrow direction.

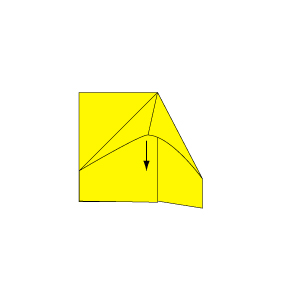
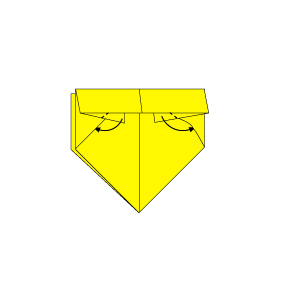
Step 4
Open the flap and press it flat, as if crushing it gently.
Step 5
Continue by folding the flap as in Step 4.
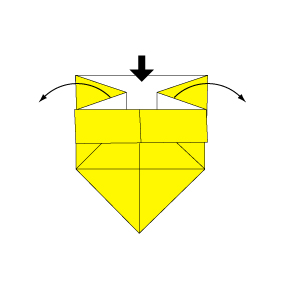
Step 6
Turn the paper over to reveal the other side.
Step 7
Open the flap again and press it flat to secure the fold.
Step 8
Fold along the dotted lines in the direction of the arrows; repeat the fold on the back side as well.
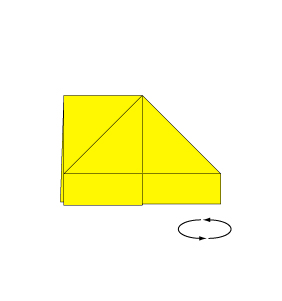
Step 9
Rotate the paper to change its orientation.
Step 10
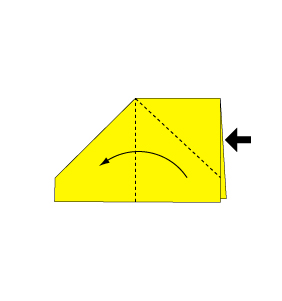
Fold along the dotted lines in the arrow direction; be sure to fold the back side in the same manner.
Step 11
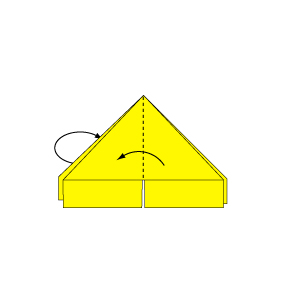
Fold along the dotted lines once again, ensuring both sides are folded consistently.

Step 12
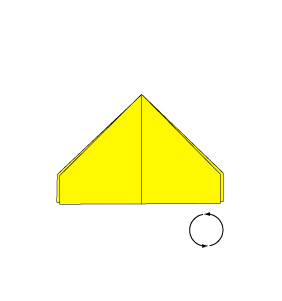
Fold along the dotted lines and insert the flap into the pocket; repeat on the back side.
Step 13
Fold along the arrow direction once more to create a strong crease.
Step 14
Open the folded section along the arrow direction.
Step 15
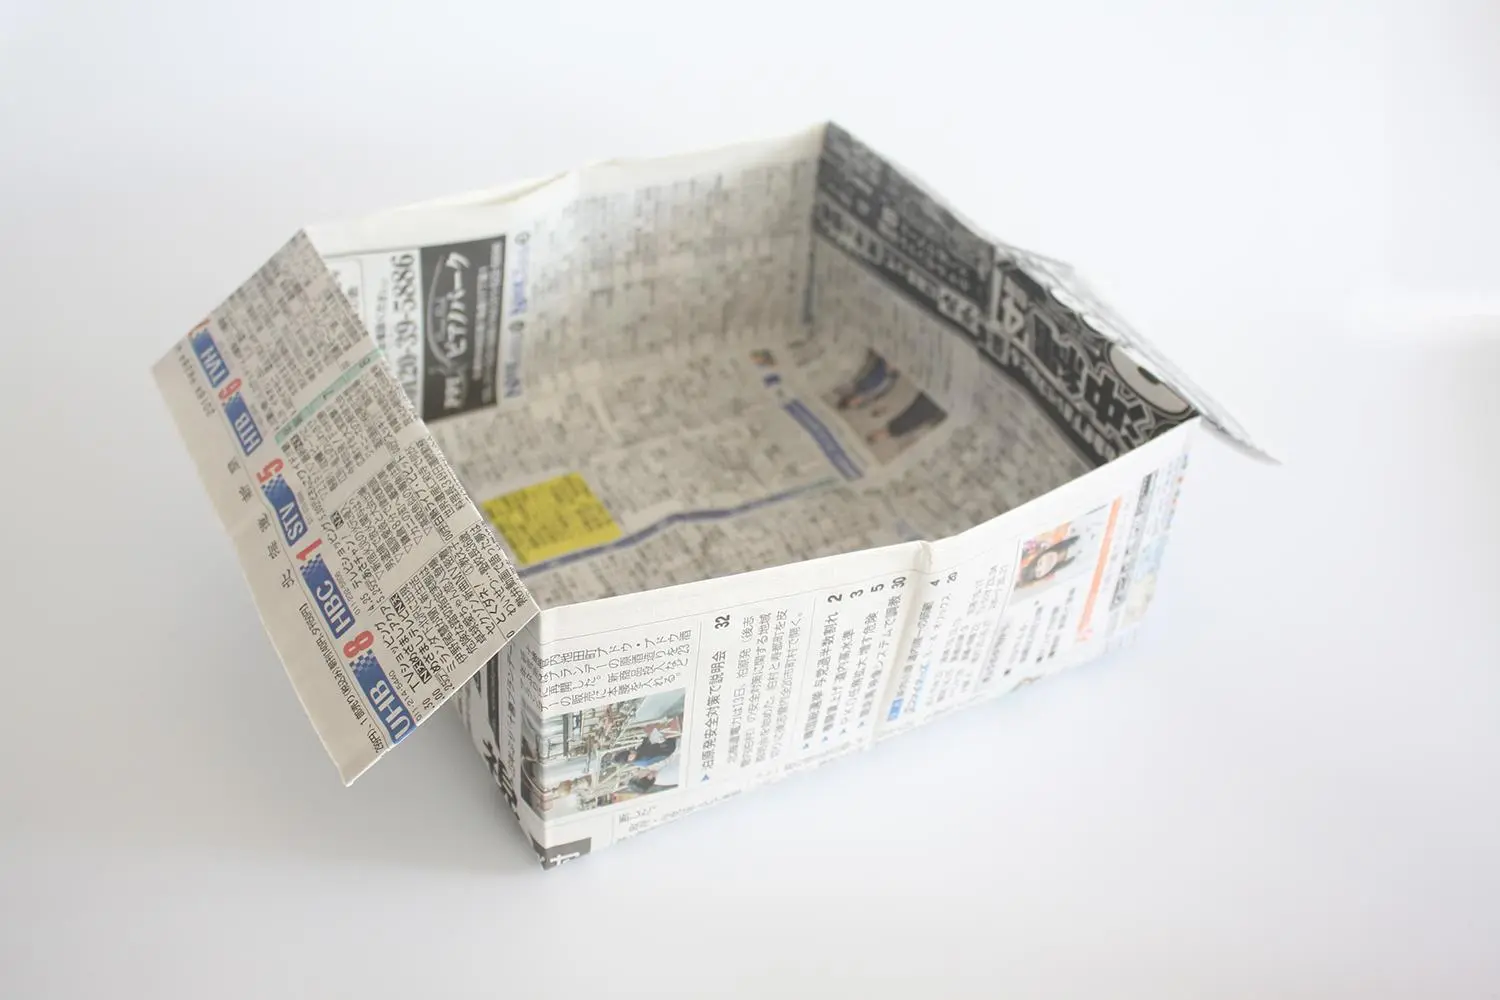
Your paper trash can is complete!
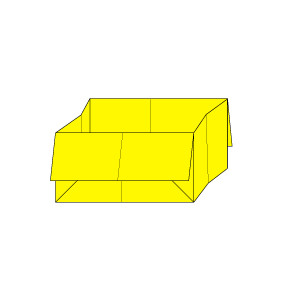
Conclusion:
Your very own paper trash can is now complete! With just a few folds, you’ve transformed ordinary paper into a versatile, practical container that’s ideal for both home and office use. Keep a few extra on hand—they’re perfect for quick clean-ups or as disposable bins when you’re on the go. Enjoy this sustainable craft project that’s as functional as it is fun!
Comments