
- Origami Jet Airplane: A Fun Activity for All Ages
- How to make an ORIGAMI Airplane 4.
- Step 1: Fold the Paper in Half
- Step 2: Fold the Top Corners Down
- Step 3: Turn the Paper Over
- Step 4: Fold the Top Edges to the Center
- Step 5: Expand the Rear Section
- Step 6: Fold the Sides Inward
- Step 7: Fold Back the Wings
- Step 8: Fold the Wing Tips
- Step 9: Final Adjustments
- Tips for Better Flights:
- Why This Origami Jet Airplane Stands Out
- Conclusion: Fold, Fly, and Have Fun!
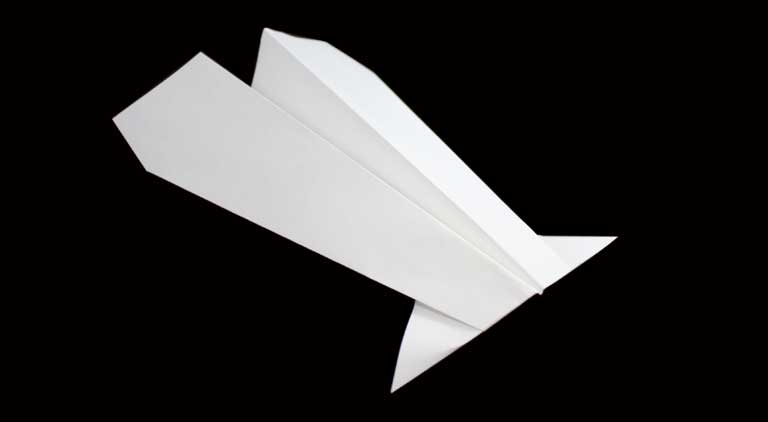
Origami Jet Airplane: A Fun Activity for All Ages
Origami isn’t just a craft—it’s a creative, educational, and engaging activity for both children and seniors. This origami jet airplane, with its unique design and landing base, is a fantastic DIY project that offers endless fun while helping kids learn about shapes, folds, and following instructions. Plus, it can serve as an excellent brain-training activity for seniors. Let’s dive into this simple step-by-step guide to create a paper airplane that looks unusual yet flies surprisingly well!
Materials You Need:
- A4 paper (recommended)
- Flyers, recycled paper, or any rectangular sheet of paper
Benefits of Making Origami Airplanes:
- Educational for Kids: Develops spatial awareness, concentration, and fine motor skills.
- Brain Training for Seniors: Folding steps help stimulate memory and cognitive functions.
- Fun for Airplane Enthusiasts: The jet design adds a creative twist to traditional paper planes.
How to make an ORIGAMI Airplane 4.
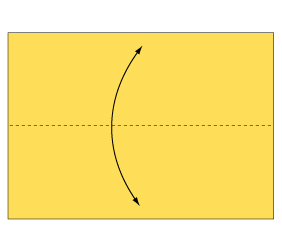
Step 1: Fold the Paper in Half
Fold the paper in half lengthwise to create a crease. Open it up again.
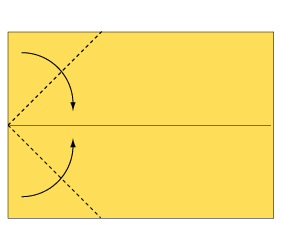
Step 2: Fold the Top Corners Down
Bring the top left and right corners toward the center crease, forming two triangles.
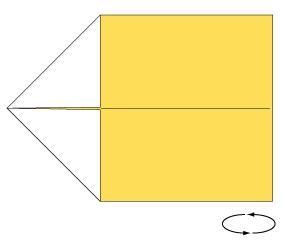
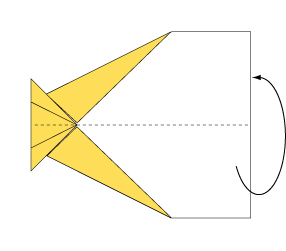
Step 3: Turn the Paper Over
Flip the paper to the other side to prepare for the next folds.
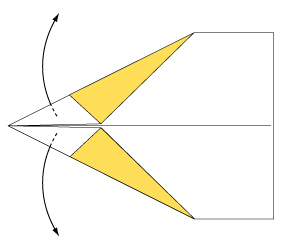
Step 4: Fold the Top Edges to the Center
Fold both top edges inward along the dotted lines, meeting at the center crease.

Step 5: Expand the Rear Section
Gently expand the rear section of the paper to create a stable base.
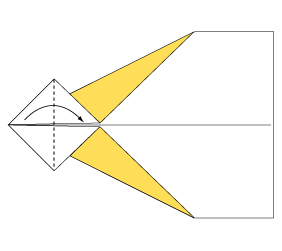
Step 6: Fold the Sides Inward
Fold each side inward along the dotted lines to create the body structure.
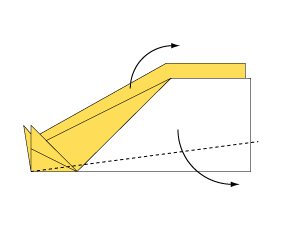
Step 7: Fold Back the Wings
Fold the wings backward along the dotted lines to give the airplane its signature look.
Step 8: Fold the Wing Tips
Fold each wing tip downward along the dotted lines to complete the design.
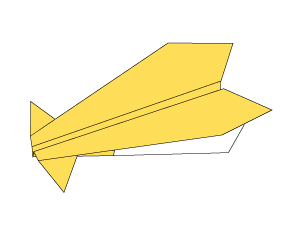
Step 9: Final Adjustments
Adjust the wings and landing base for stability. Your origami jet airplane is ready to fly!
Tips for Better Flights:
- Throw the airplane with a gentle, level toss for the best flight.
- Slightly adjust the wingtips if it veers to one side.
- Experiment with different paper types to see how weight and texture affect performance.
Why This Origami Jet Airplane Stands Out
Unlike traditional paper airplanes, this origami jet features a distinct shape with a landing base, making it unique and exciting. It’s a fantastic project for classrooms, family time, or solo activities. Whether you’re helping kids develop essential motor skills or encouraging seniors to engage in mental exercises, this airplane delivers fun for everyone.
Conclusion: Fold, Fly, and Have Fun!
Origami offers a delightful mix of learning and creativity, and this jet airplane design brings a fresh twist to a classic craft. Get your paper, follow the steps, and enjoy watching your creation soar!
Happy folding!
For more fun origami projects, visit Origami Japan.
Comments