

Want to organize your desk in a creative way? Learn how to make a mini bookshelf from paper with this easy origami bookshelf tutorial. This design is perfect for storing small books, cards, or decorations. You can use A4 paper, newspaper, or origami paper to craft this simple yet functional paper storage box.
Let’s get started!
How to Make an Origami Mini Bookshelf
This origami bookshelf is made in 9 easy steps and can also be transformed into a paper storage box when combined with another unit.
Materials Needed:
✔ 1 sheet of Square paper (or any paper type)
✔ Patience and precision
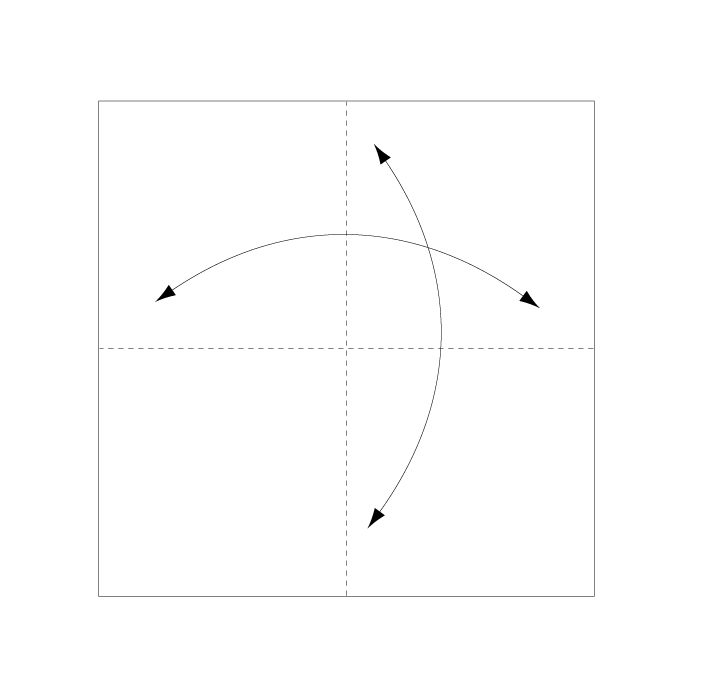
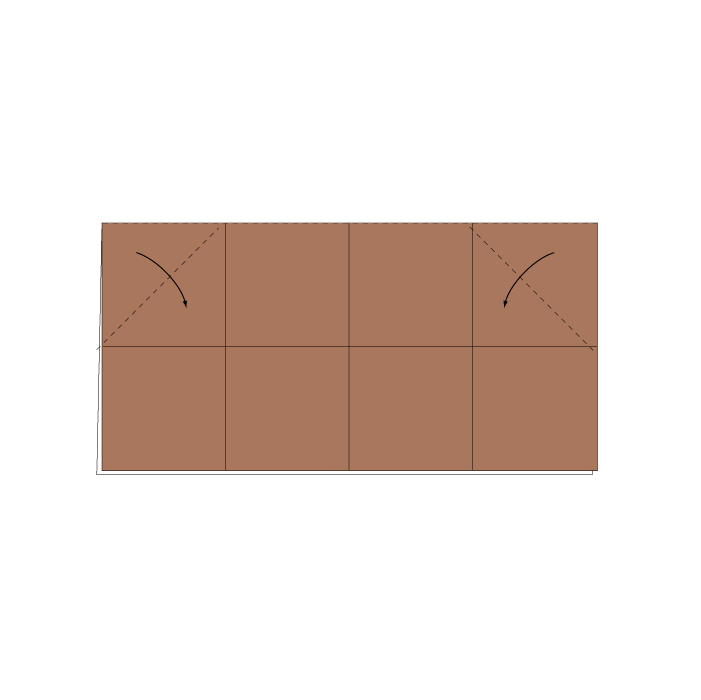
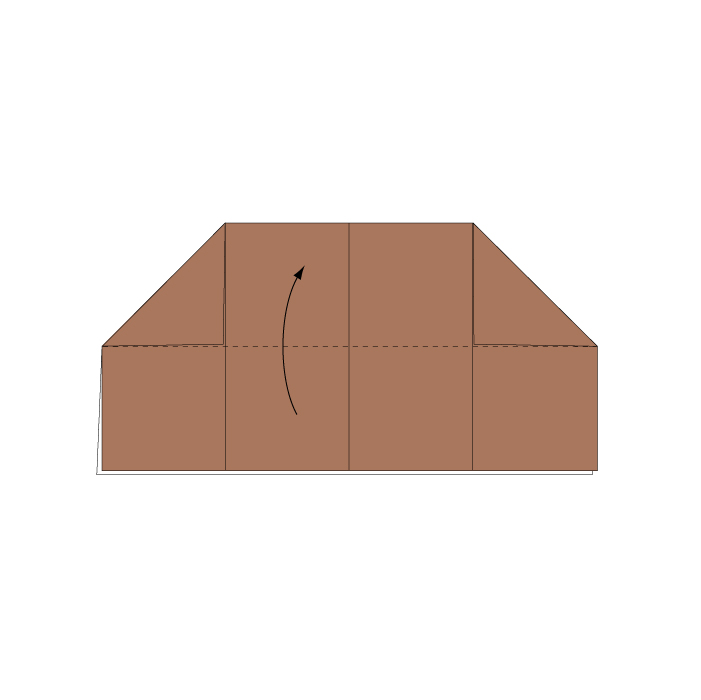
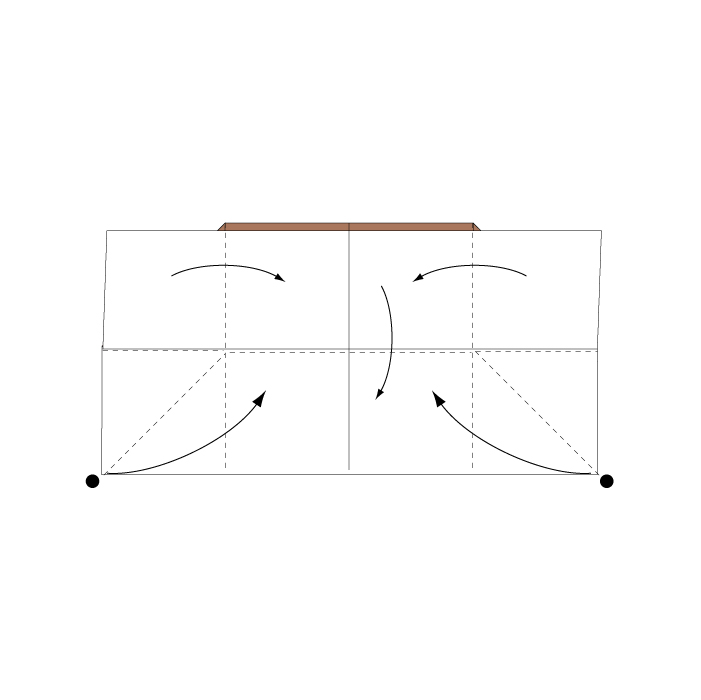
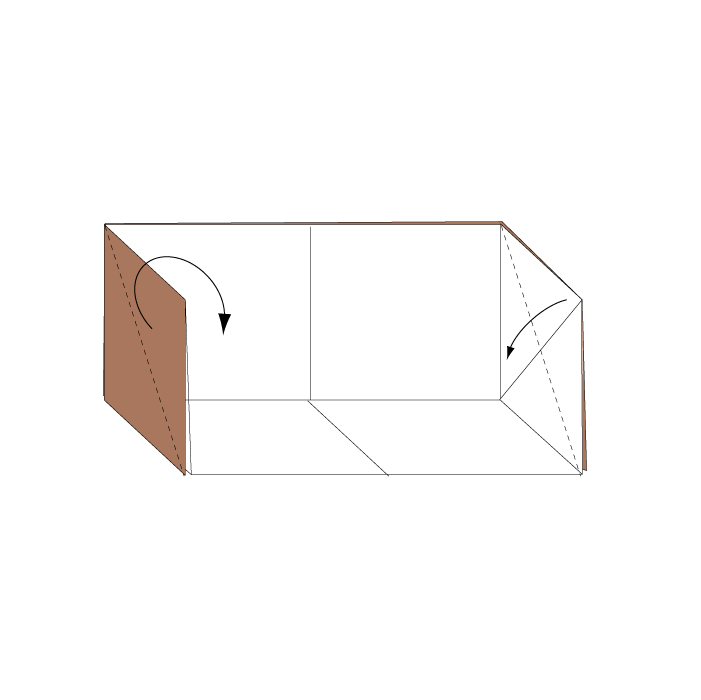
Follow these simple folds to create a mini bookshelf that can be expanded into a box. Perfect for storing small items on your desk! Fold and crease in the direction of the arrow. Fold and crease in the direction of the arrow. Fold and crease in the direction of the arrow. Fold the paper along the dotted line. Fold the paper along the dotted line. Fold the paper along the dotted line. Assemble the bookshelf structure. Fold the paper along the dotted line in the direction of the arrow. Your mini bookshelf is complete! You can also combine multiple pieces to create a box.How to Make an Origami Mini Bookshelf
Step 1
Step 2

Step 3

Step 4

Step 5
Step 6
Step 7
Step 8
Step 9

How was it? This origami bookshelf is simple, but assembling it can be a bit tricky. Once you get the hang of it, you can complete it in just a few minutes! 📚✨
✅ Pro Tip: If you increase the size of the paper, you can use it for larger storage options. Try making a few and stacking them to create a modular origami storage box!
Comments