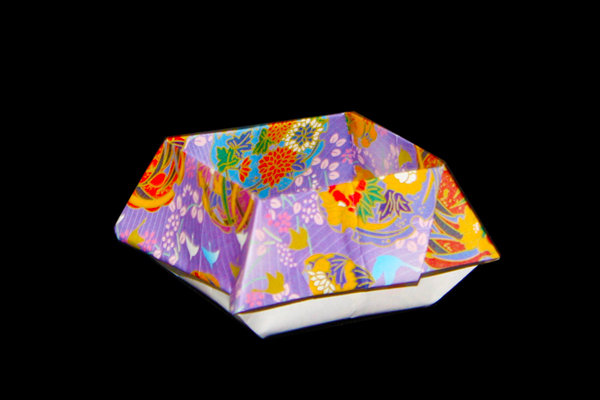
This versatile Origami box / bowl can be made using colorful paper, double-sided is best, and make lots! then you’ll be so organized! They are great for holding candies, trinkets, jewelry.. well just about anything really!
How to make an ORIGAMI Box / bowl .
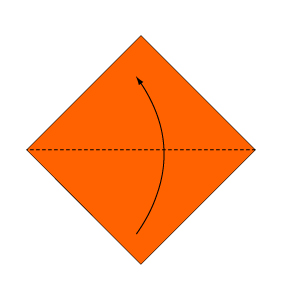 |
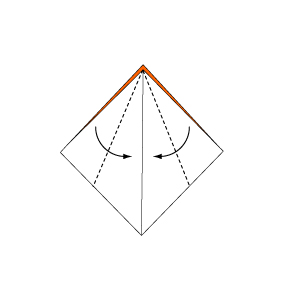
Step 1
Fold the paper along the dotted line in the direction of the arrow. |
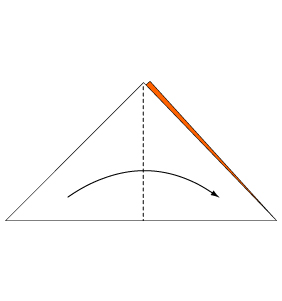 |
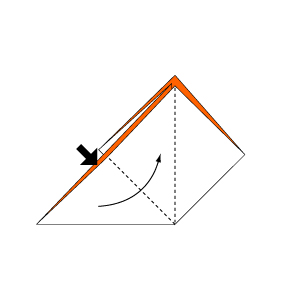
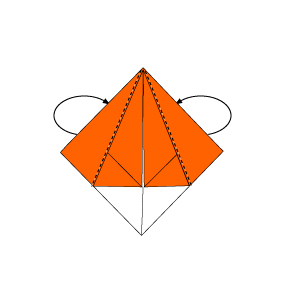
Step 2
Fold the paper along the dotted line in the direction of the arrow. |
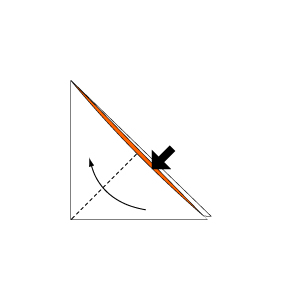 |
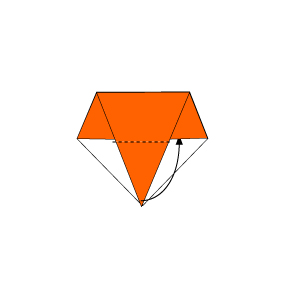
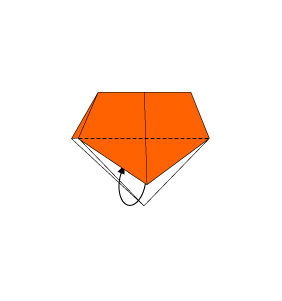
Step 3
Open the paper as shown to create a small pocket. Then flatten down the sides of the pocket. |
 |
Step 4
Continue from Step 3. |
 |
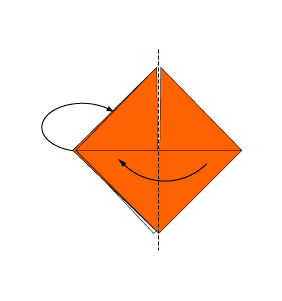
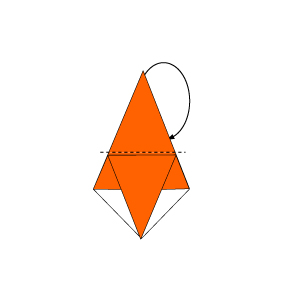
Step 5
Turn over the paper. |
 |
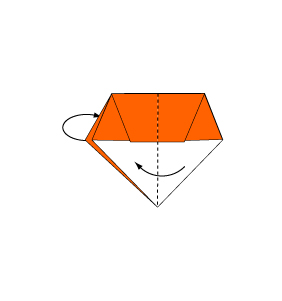
Step 6
Open the paper as shown to create a small pocket. Then flatten down the sides of the pocket. |
 |
Step 7
Fold the top flap only, in half, toward the bottom. Fold the reverse side in the same manner. |
 |
Step 8
Fold the paper along the dotted line in the direction of the arrow. Fold the reverse side in the same manner. |
 |
Step 9
Fold the paper along the dotted line in the direction of the arrow. |
 |
Step 10
Fold the reverse side in the same manner. |
 |
Step 11
Fold the paper along the dotted line in the direction of the arrow. |
 |
Step 12
Fold the reverse side in the same manner. |
 |
Step 13
Fold along the dotted line in the direction of the arrow and insert the edge into pocket. Fold the reverse side in the same manner. |
 |
Step 14
Fold the paper along the dotted line in the direction of the arrow. Fold the reverse side in the same manner. |
 |
Step 15
Fold along the dotted line in the direction of the arrow and insert the edge into pocket. Fold the reverse side in the same manner. |
 |
Step 16
Open the paper in the direction of the arrow. |
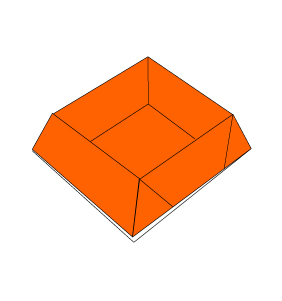 |
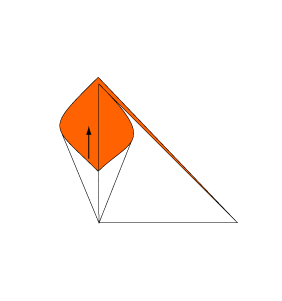
Step 17
Complete. |
Comments